
Using SSH Certificates to Access Remote Machines
Deeper DiveFor more in-depth information, check out our detailed documentation on the following topics:
How to Configure Keyless SSH
Need any help?If something in this tutorial isn't working as expected, feel free to contact our support team via Slack.
Below is a text-only guide for users based on the above video
Why use SSH Certificates?
Companies that are scaling their cloud infrastructure quickly take on large numbers of servers and keys. Admins are stuck issuing, revoking, and managing these keys instead of building automation. There are two main problems with them:
- SSH keys can get lost in the shuffle
- Keys that were intended to be “temporary”, stick around on the server, even after a developer leaves the company, or after a script is obsolete.
A common solution is using an SSH Key Management software to rotate keys, provision new ones, and audit locations where the keys are used. But then you need to:
- Manage an inventory of private keys for all machines each user wants access to
- Manage an inventory of which public keys are allowed for each machine
Akeyless, using a single sign-on, connects an SSH client to the server, using your chosen Authentication Method, while using existing Access Groups and Policies in your environment. But, instead of issuing SSH key pairs, Akeyless provides ephemeral SSH certificates to allow access over standard SSH protocol while eliminating the need for public SSH keys on the server side.
You can define several SSH certificate authorities (CAs). Each CA can sign your SSH public keys, with additional parameters like expiration date, principals, extensions, etc. You can sign the certificate with your own private key or generate a new one using Akeyless.
Prerequisites
Ensure that you either create or have a public and private SSH key on your local machine. Linux machines and Macs have those by default. For Windows machines, you will be required to create your own public and private key. The private key will be used to confirm your identity when starting a session.
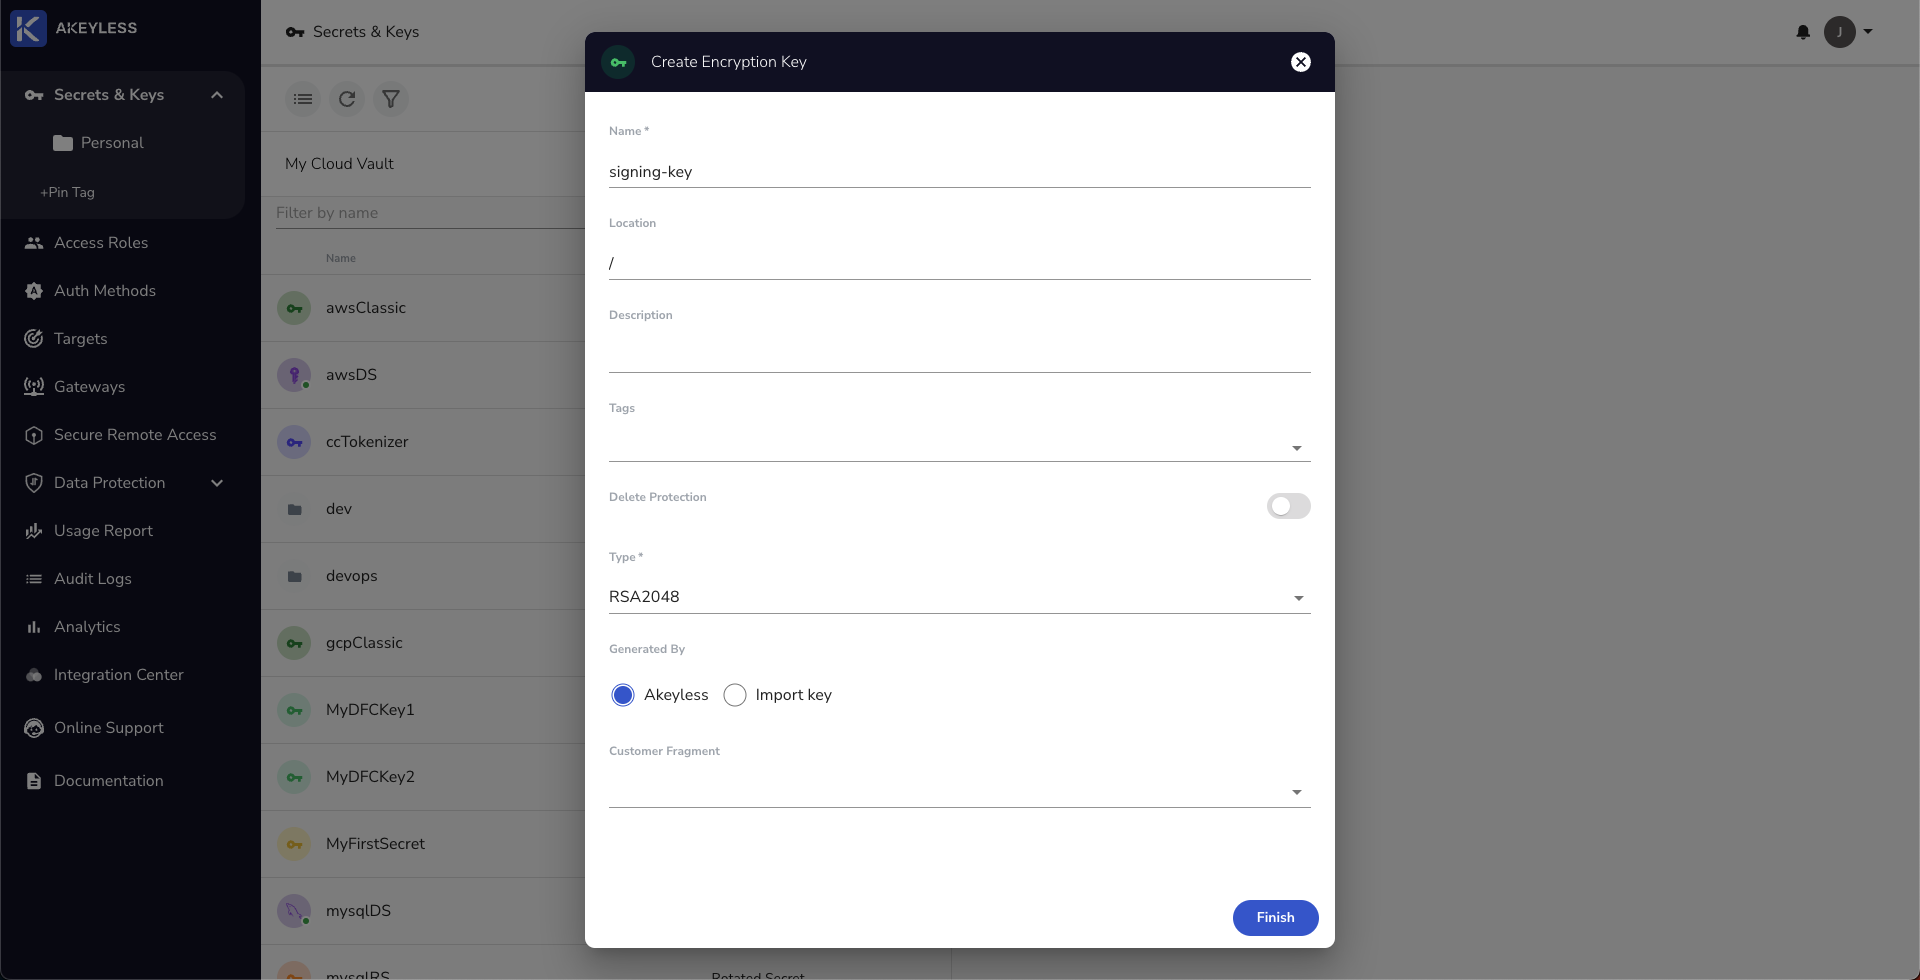
Create a key
Next, create a new RSA key in, or upload to, Akeyless using either the UI or CLI. We will call it signing-key.
In the UI, you can choose to use Akeyless to create a new key or upload your key:
From the CLI, use the following command to upload your key:
akeyless upload-rsa --name your-RSA-key-name --alg RSA2048 --rsa-key-file-path Path-to-RSA.pemOr use the following command to create a new RSA key:
akeyless create-key --name your-RSA-key-name --alg RSA2048Next, run the following command to display the key:
akeyless get-rsa-public --name your-RSA-key-nameThe output should look like this:
NoteYou will use the SSH section beginning ssh-rsa AAAAB3Nz... for the next step
- RAW: MIIBIjANBgkqhkiG9w0BAQEFAAOCOA89zd/GgaPmzisJ3PMqYy3cPvRJc7VWRu72wR9muOdHX3vP7bscR+fGgKuOn1XPXBPjsOmo
- SSH: ssh-rsa AAAAB3NzaC1yc2EAAAADAQABAAABAQMpAMLn3TyairCPzfIqG4wUJFTWCemKV5Z0blvxzUuZnkWUHRdSnowxXyANqQcZ
- PEM: -----BEGIN RSA PUBLIC KEY-----
MIIBIjANBgkqhkiG9w0BAQEFAAOCAQ8w0BAQEFAAOCAQAQdfIsN7oV4BZdlj9PT8
xi+XdAcQeElmSEgetlQ3INYfdUzOEwroj4RlscYhKPeF730gtlQ3INYfdUzOEwro
WgAaZ+XdAcQeElmSEgetlQ3INYfdUzOEwroj4RlscYhKPeF730gkVv502+LCLeC3
53jXHt2ZYUnUzJUt1Bhnm33Sa/YYUl5ZSxru1f10D2FCYi2njsQoMgxxoN9GYDdp
53jYUnUvYUnUnm33Sa/uY31iXrMKQcP6QJ2IauY31iXrMKQcP6QJ2IauY31iXrMK
l4BfQzeHV23YLvCLDRVB5YxXHogQ00IDGjYFPbp3KuYVqIZiDcTdmQ0HsHE28bQe
-----END RSA PUBLIC KEY-----
Configure the server
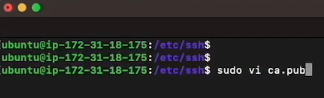
Create the key on the remote machine using the SSH format. Log into that remote machine's SSH folder and create a new file (we will call it 'ca.pub') and paste in the SSH format of the key and Save it.
Next, add these two lines at the end of the sshd_config file, located at /etc/ssh/sshd_config in order to make sure that everything is accepted on the remote machine:
TrustedUserCAKeys /etc/ssh/ca.pub

PubkeyAcceptedKeyTypes=+ssh-rsa,[email protected]
NoteYou can add Principals as well to the sshd_config file to limit access. See more in the Docs.
Then, run the following command to restart the SSH server:
sudo service ssh restartGenerate a Certificate
Now we're ready to create our Certificate Authority and then issue a certificate.
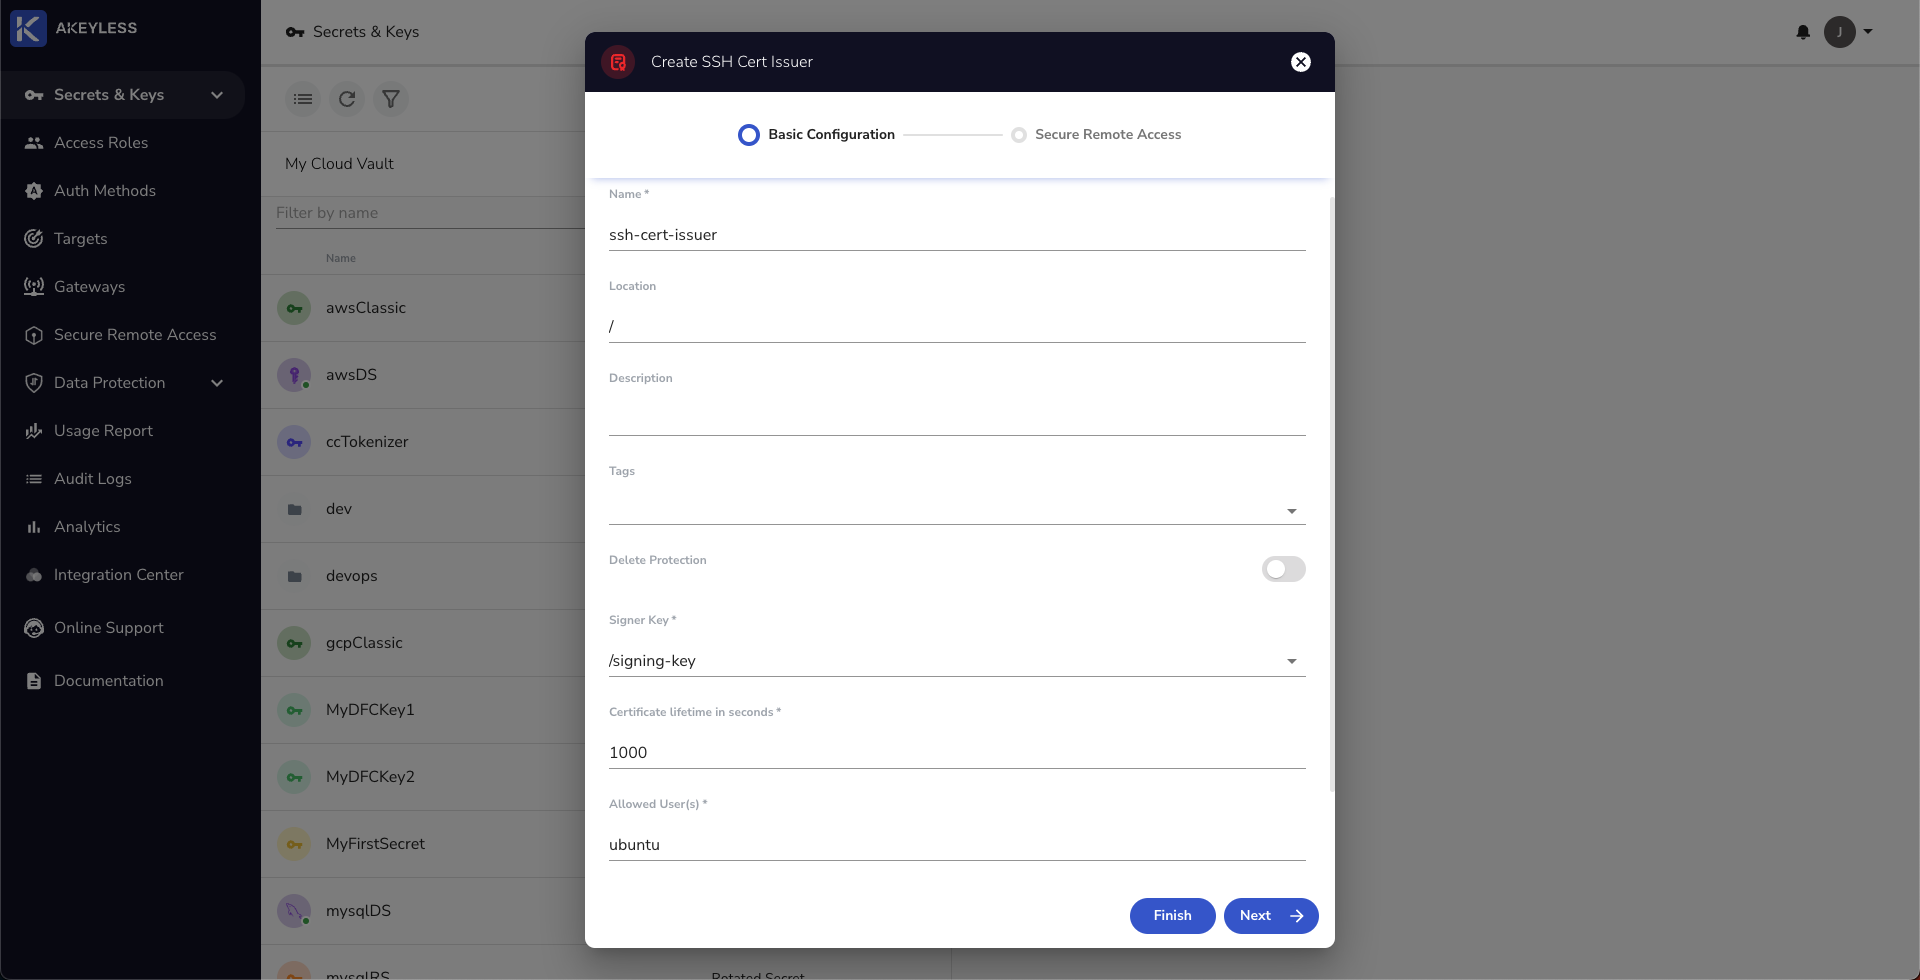
Create a Certificate Authority (CA)
First, create an SSH Certificate Issuer in Akeyless (we will call it ssh-cert-issuer). This can be done from the UI by clicking 'New' -> 'SSH Cert Issuer' or using the CLI.
From the CLI, use the following command:
akeyless create-ssh-cert-issuer --name your-ssh-cert-issuer-name --signer-key-name your-signing-key-name --allowed-users 'ubuntu' --ttl 300
NotesThe signer_key_name is the private key we created earlier called "signing-key".
The allowed_users are the names of specific users on the machine and supports wildcard.
Issuing an SSH Certificate (user-specific actions)
Once there is a key and certificate issuer set, users can now simply generate an SSH Certificate signed by the CA in order to log into the machine. This can also be done from the UI or CLI.
From the UI
Find the SSH Certificate Issuer in your console, then click on the Generate SSH Certificate button and then add the information required.
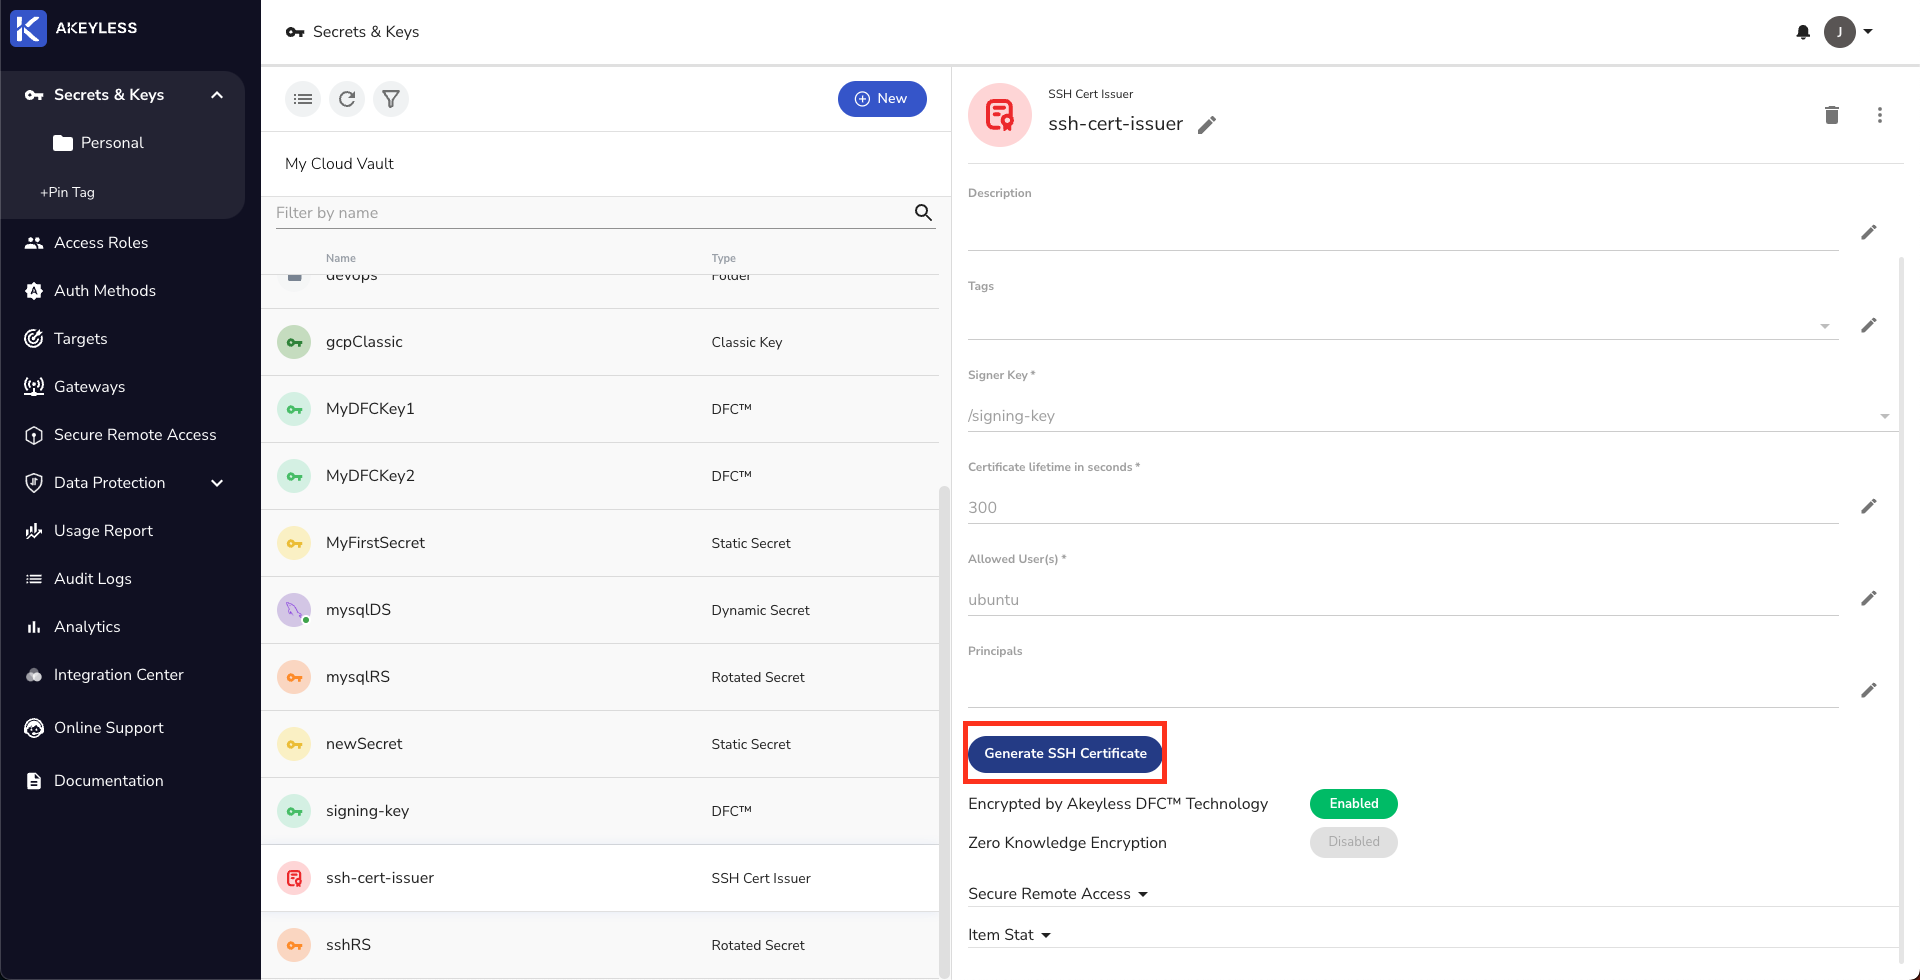
Click the generate button, and if all parameters are valid, you will get a string representing your certificate. Download the certificate, or copy it to a file, in the ssh folder.
You should now be able to connect to the server without a key using the following command:
ssh user@serverFrom the CLI
From the CLI on your local machine, use the following command to generate the certificate:
akeyless get-ssh-certificate --cert-username ubuntu --cert-issuer-name your-ssh-cert-issuer-name --public-key-file-path ~/.ssh/id_rsa.pubYou should now be able to connect to the server without a key using the following command:
ssh user@serverUpdated over 1 year ago