
Installing the Gateway on Kubernetes
Deeper DiveFor more in-depth information, check out our detailed documentation on the following topics:
Akeyless GatewayStandalone Docker Gateway Installation
Need any help?If something in this tutorial isn't working as expected, feel free to contact our support team via Slack.
Below is a text-only guide for users based on the above video
What is Akeyless Gateway?
The Akeyless Gateway is a stateless Docker container that is also available for Kubernetes and is deployed within your own network. The Gateway communicates directly with the Akeyless SaaS acting as a SaaS extension of our core services which enables transparent internal operation.
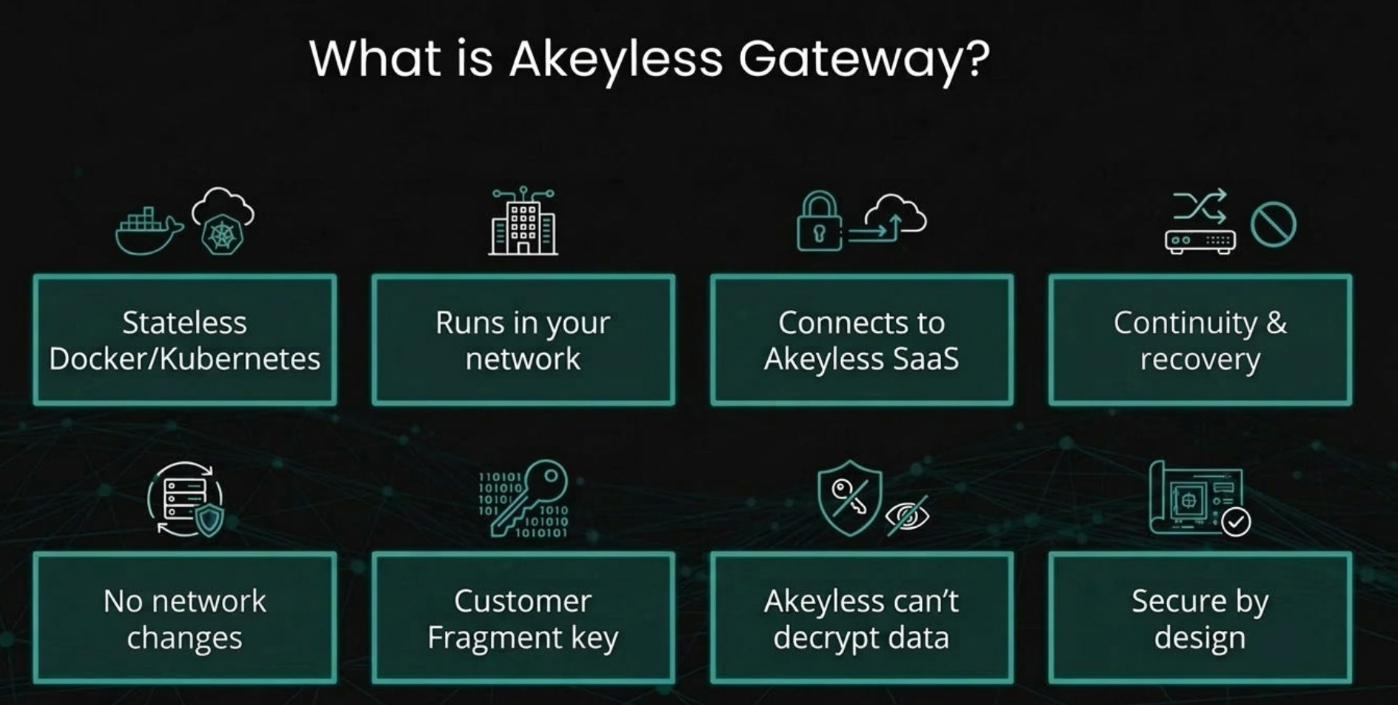
It comes with a robust out-of-the-box mechanism to ensure service continuity and recovery. And you are not required to change any network infrastructure in order to work with your internal resources.
The Gateway also holds the Customer Fragment. This is your piece of the patented DFC encryption key used for all encryption and decryption. Since Akeyless doesn’t have access to your network, where the Gateway and fragment are held, even Akeyless does not have access to decrypt your data.
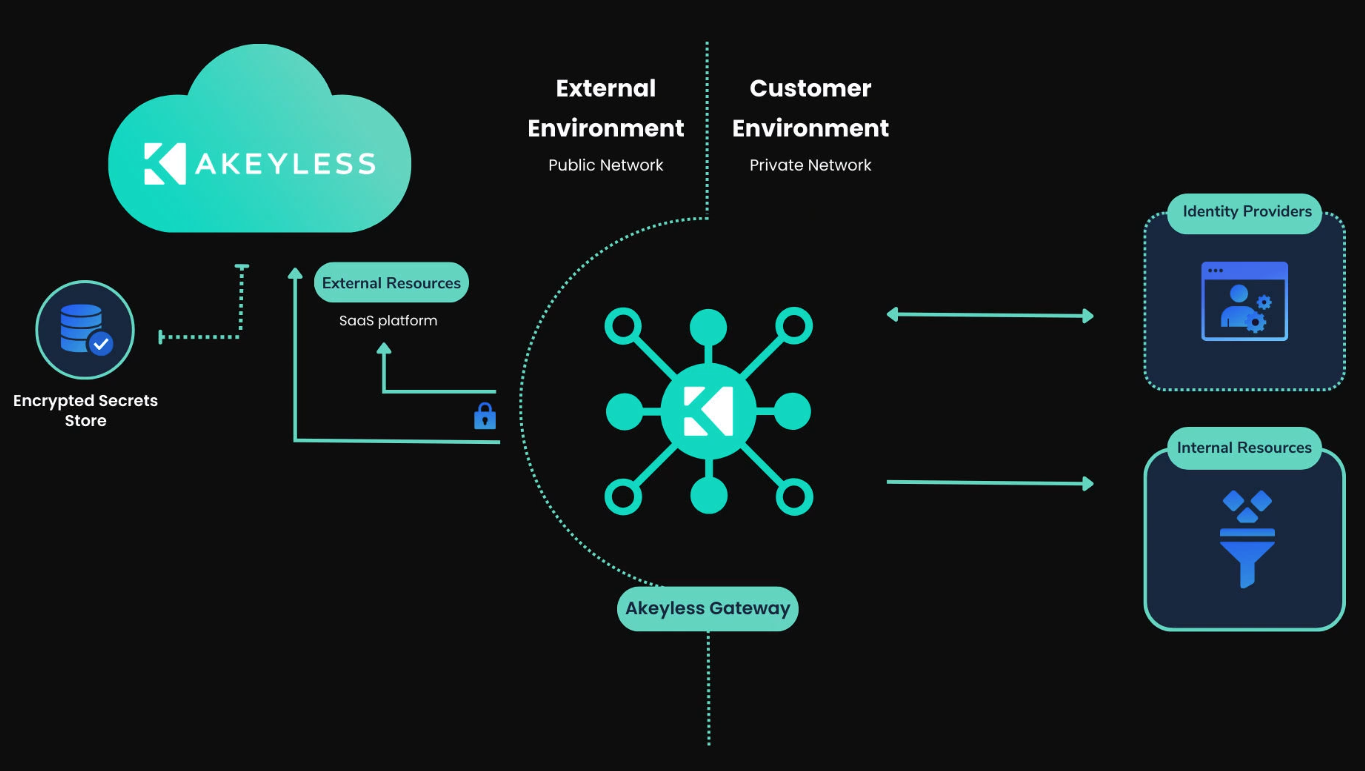
Here’s a diagram showing where the Akeyless Gateway sits between your internal environment and the external services.
Installing your Gateway
For this demonstration, we’ll deploy the gateway using Google Kubernetes Engine to simulate a real‑world setup.
Prerequisites
In order to deploy a Gateway, we will need an Authentication Method with an Access Role to create and manage Items and Targets.
We will also need Helm and kubectl installed on our local machine.
Kubernetes needs to be installed along with the Kubernetes Metrics Server on your remote server with a minimum 1 vCPU available with 2 GB RAM.
Lastly, we will need to enable network connection to Akeyless SaaS Core Services from your cluster. You can learn more about that in our docs.
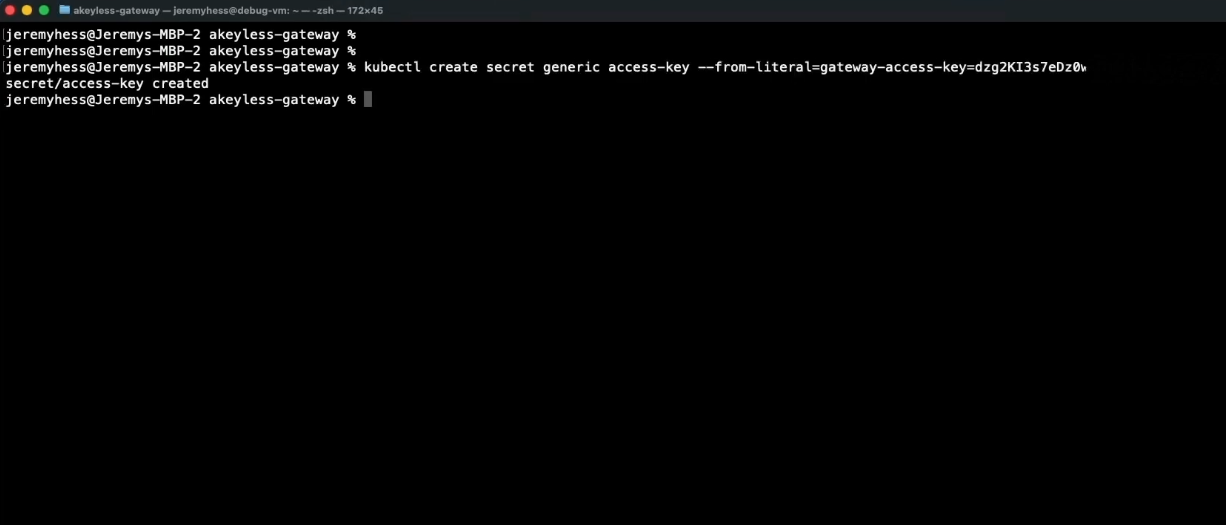
Create Kubernetes Secret for Access Key
To get started, we need our API Key Authentication Method.
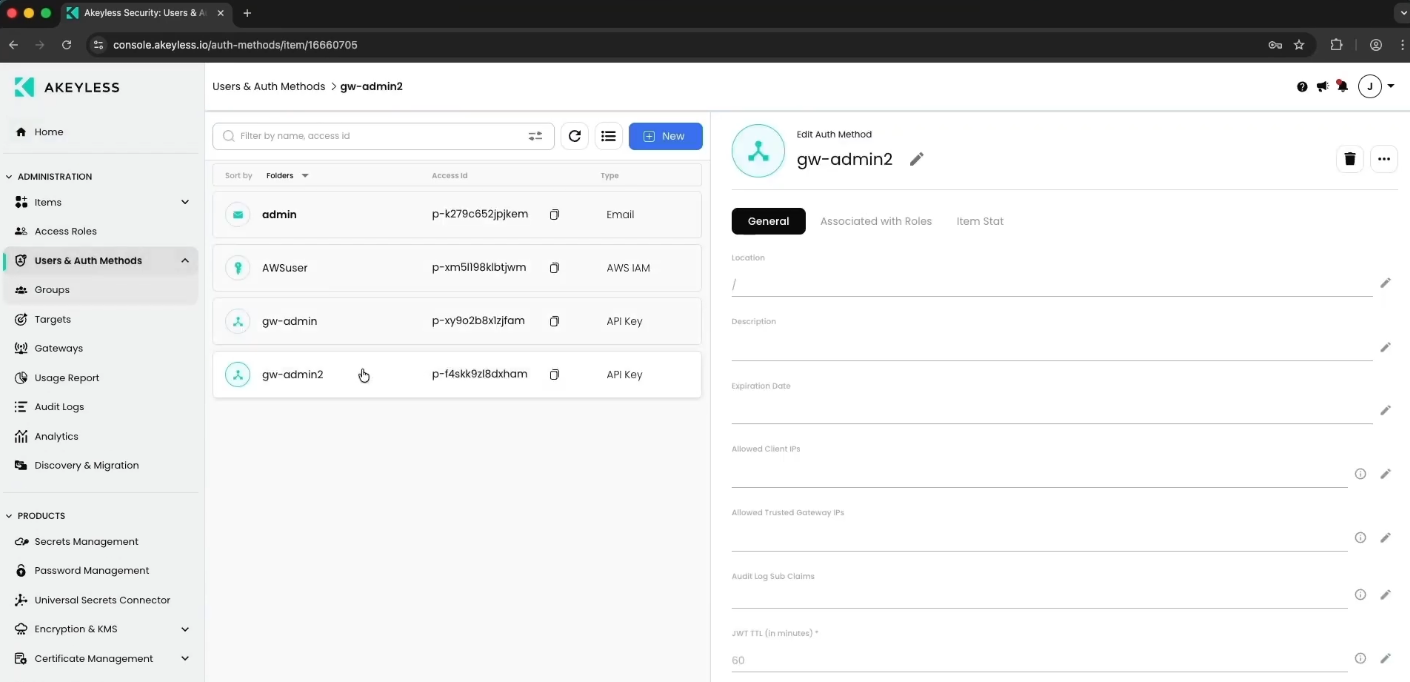
This auth method requires a dedicated Kubernetes Secret to store the corresponding Access Key where the key name of the secret has to be gateway-access-key.
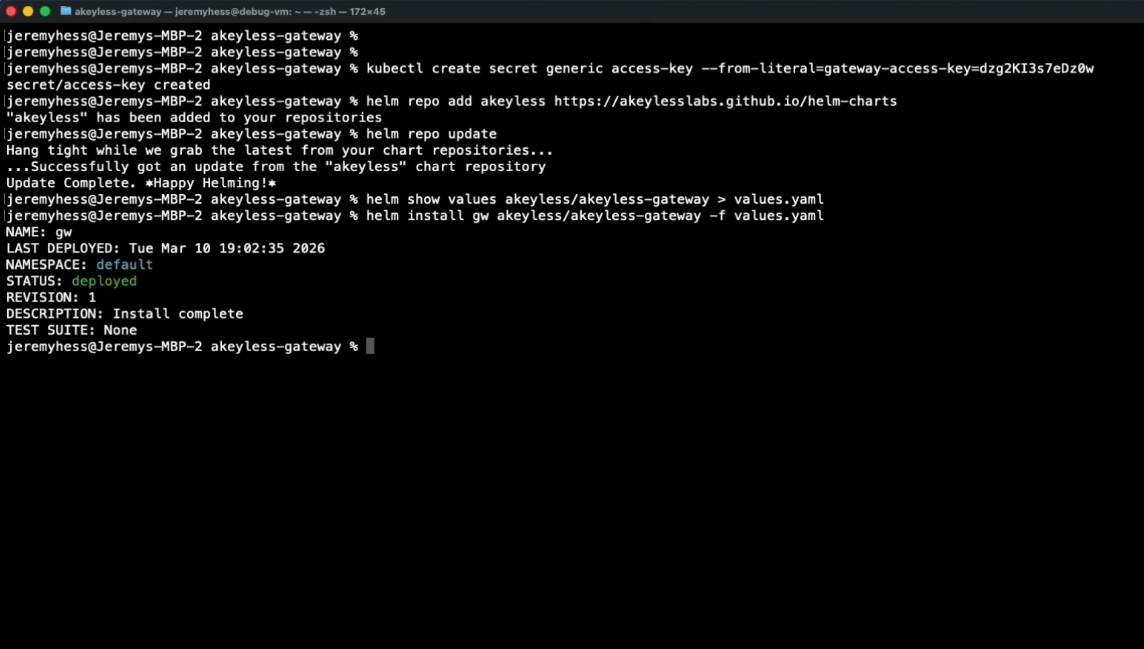
Make sure you are inside your cluster, and, in your terminal, run the kubectl create secret command as you see on screen with your actual access key.
Add Akeyless Helm Repo
Next, add the following Helm repository and update your Helm repos using the helm repo add and helm repo update commands.

Download values.yaml file
Then, download the values.yaml file from the Akeyless repository with the helm show values akeyless/akeyless-gateway > values.yaml command. The file will be downloaded into the folder you are currently in.

Configure Basic Parameters in values.yaml file
We will now need to set the relevant parameters in the values.yaml file using a text editor.
Going through the file, we can see there are a lot of options. For our use case, we will choose a simple setup with the most basic parameters.
In the file, go to the gatewayAccessId field and add the auth method ID. Then set the gatewayAccessType to access_key. And the gatewayCredentialsExistingSecret to access-key.
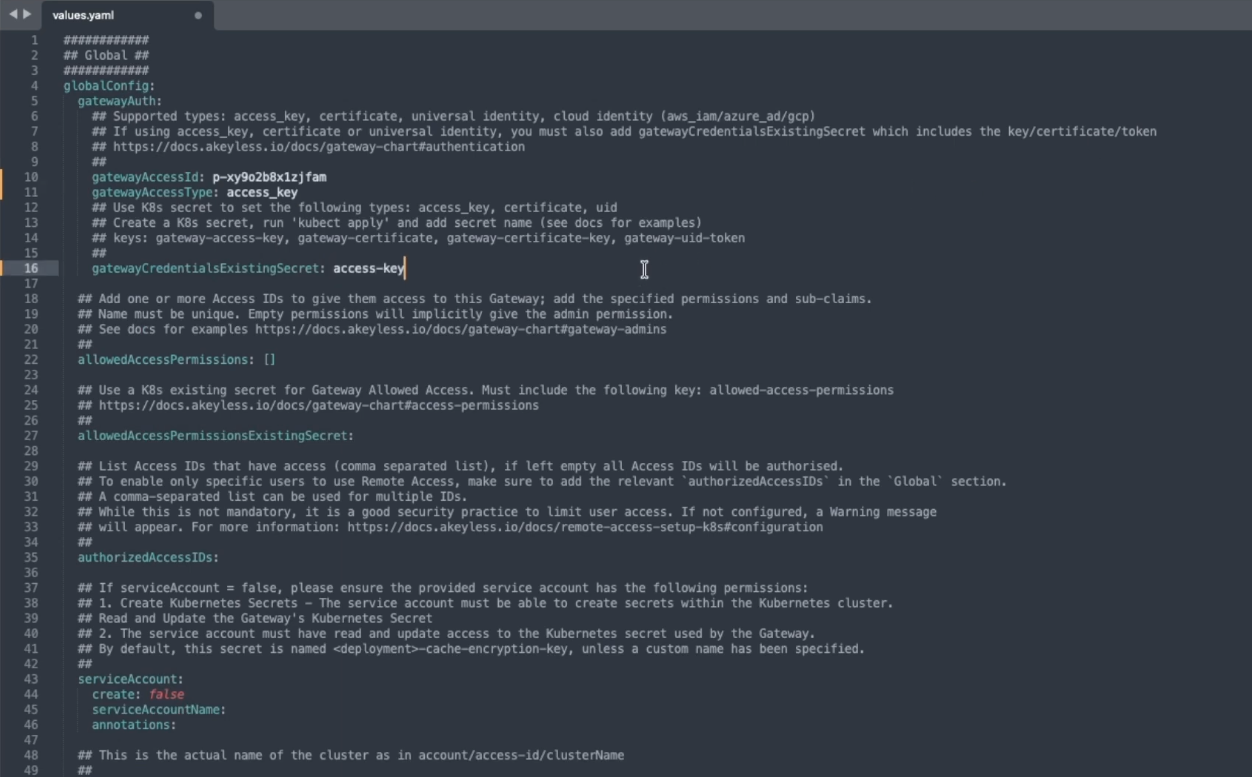
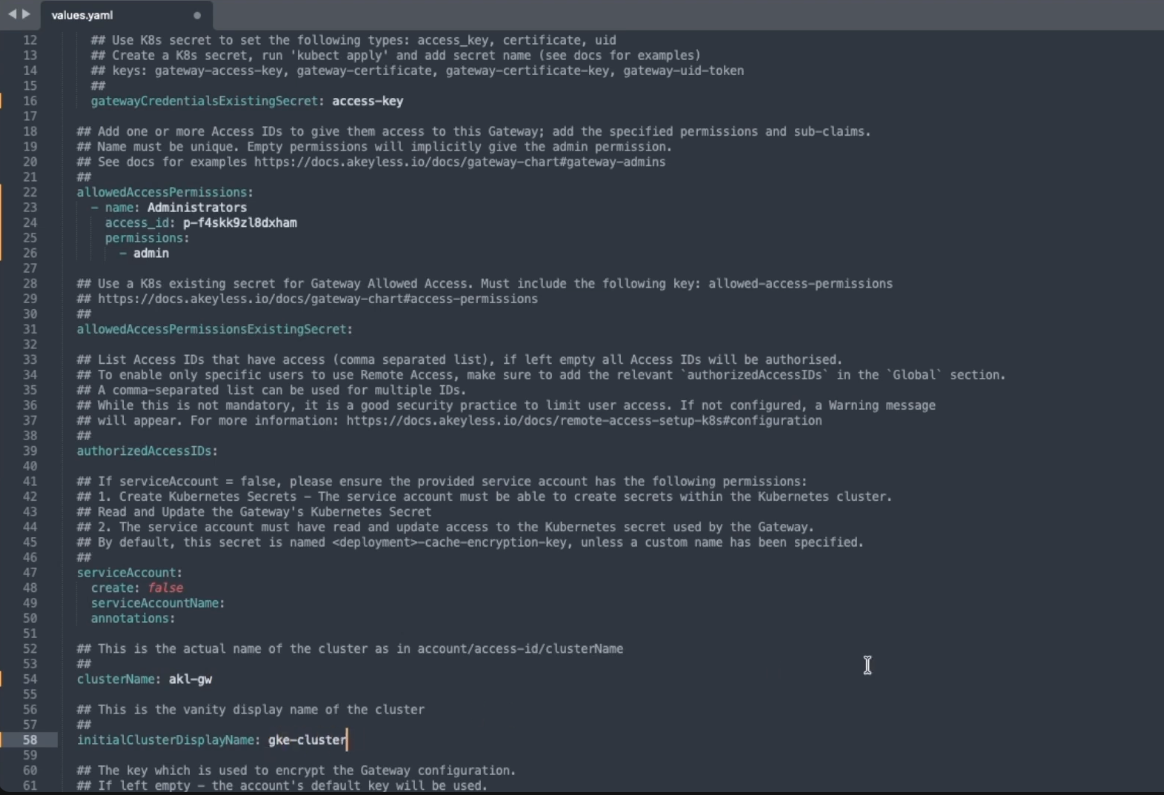
You have the ability to enable specific permissions for other gateway users in the allowedAccessPermissions section as well and we added another admin user here.
We also give a clusterName and initialClusterDisplayName which show in your account.
Once you save the file, go back to your terminal and run the helm install command.
Then, check your pod progress by running kubectl get pods -w.
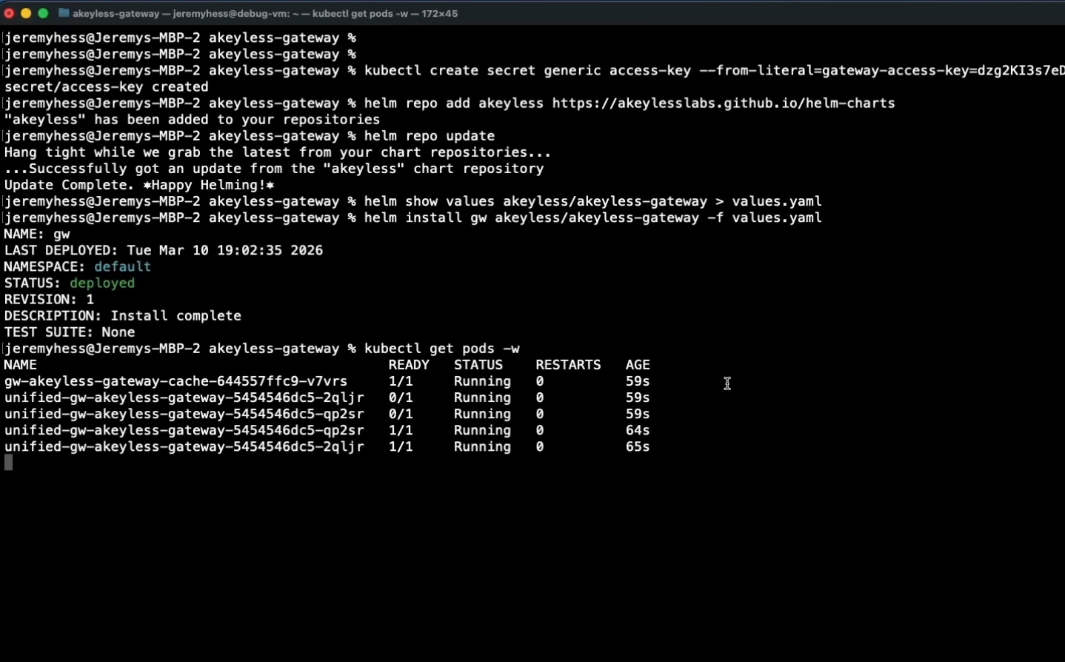
Once you see the pods are ready and running, go to your browser and open your gateway endpoint. You will see the login screen for gateway console access.
From here, you can see and manage your gateway by clicking on Gateways in the left side menu and clicking the gateway.

From there, click the Manage Gateway button to see the different management options.

Updated 3 months ago