
Managing Secrets in GitLab Pipelines
Deeper DiveFor more in-depth information, check out our detailed documentation on the following topics:
GitLab PluginOauth2.0/JWT Auth Method
Need any help?If something in this tutorial isn't working as expected, feel free to contact our support team via Slack.
Below is a text-only guide for users based on the above video
The Akeyless plugin for GitLab enables a secure, easy, and integrative way to fetch Secrets into GitLab pipelines. In this demo, we will walk through how to do this with Akeyless to update a MySQL database table.
Prerequisites
- A GitLab account and project.
Set Up Authentication Method
Each job has a JSON Web Token (JWT) provided as CI/CD variable named CI_JOB_JWT_V2.
When a pipeline is about to run, GitLab uses the CI_JOB_JWT_V2 job token and generates a unique token for it.
The CI_JOB_JWT_V2 is an RS256 JSON web token that is being used to authenticate with third-party systems that support JWT authentication, in our case, Akeyless.
The token is valid only while the pipeline job runs. After the job finishes, you can’t use the token anymore.
To work with the Akeyless GitLab plugin, we will use an OAuth 2.0 / JWT Authentication Method.
OAuth 2.0 / JWT
Create Auth Method via Web UI
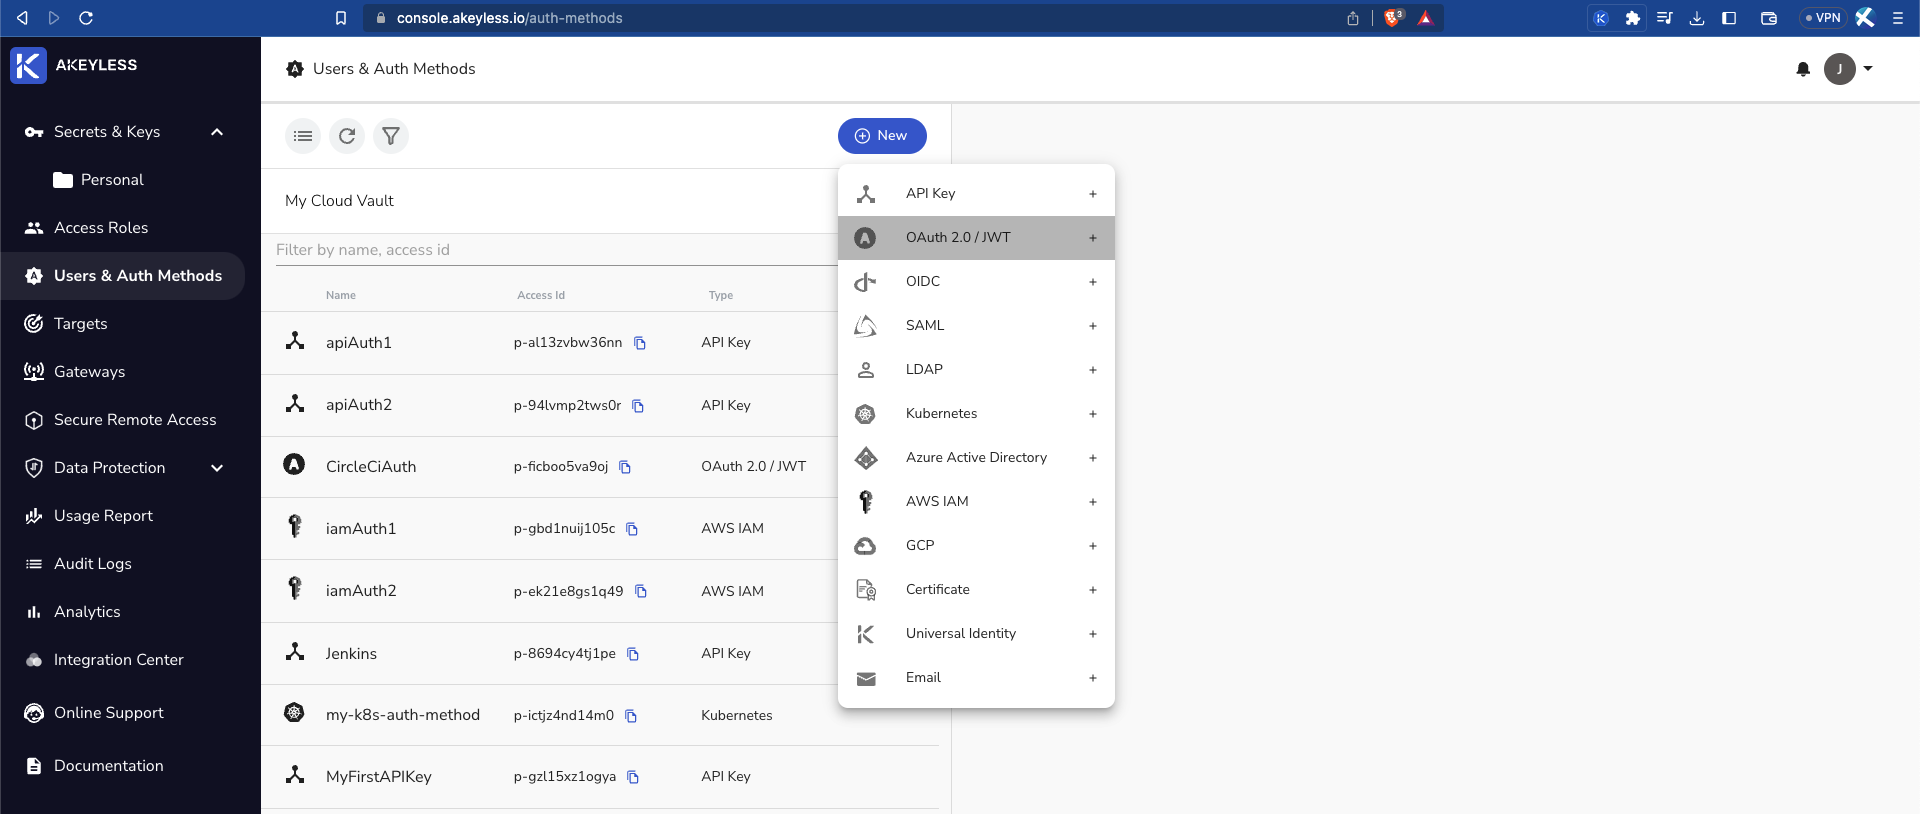
Go to the console and create your GitLab Auth Method by clicking "Users & Auth Methods" > "New" > "OAuth 2.0 / JWT".
NoteIn GitLab v16 and higher,
CI_JOB_JWT_V2is replaced by ID tokens which are the JSON Web Tokens (JWTs) that can be added to a GitLab CI/CD job. For more details please find the relevant config file in the docs.
Then add the following information:
Name: Give the Auth Method a name. In this example, we call it MyJWTAuth.
JWKs URL: The URL to the JWKS that contains the public keys that should be used for JWT verification. For this example, https://gitlab.com/-/jwks.
Unique Identifier: A unique claim name that contains details uniquely identifying the request. In this example, we will use the GitLab user_login claim.
JWT TTL: Choose the length of time the token will be available for use (in minutes).
Require Sub Claim on role association: Tick this box to enforce Sub-Claims on role association.
Create Auth Method via CLI
In Akeyless, create a new OAuth 2.0 / JWT Authentication Method with the following parameters:
akeyless create-auth-method-oauth2 --name MyJWTAuth \
--jwks-uri https://gitlab.com/-/jwks \
--unique-identifier user_login
--force-sub-claims
Access Role, Auth Method, Permissions
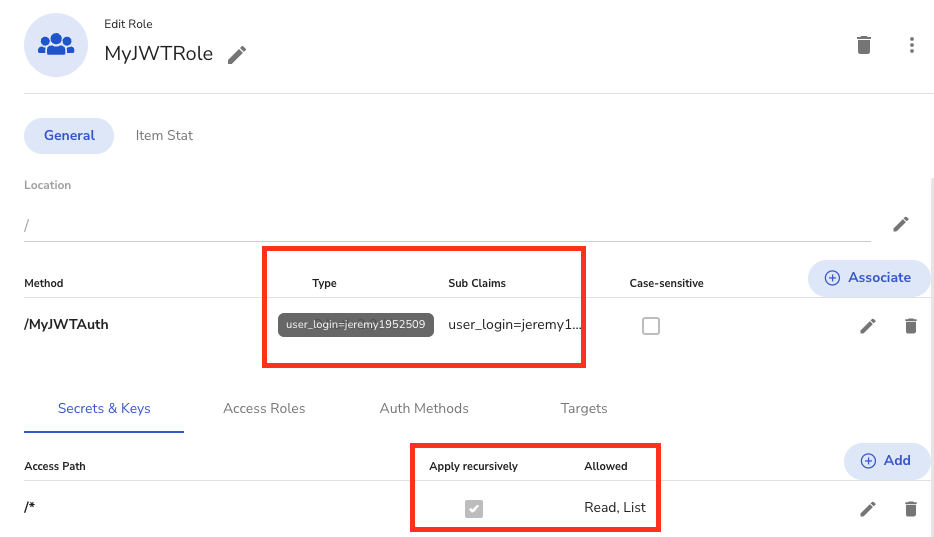
See the video on Role-Based Access Controls to create an Access Role, Associate it with the Auth Method, and provide the proper permissions. In this example, we called the role MyJWTRole.
Ensure you add the proper Sub-Claims when you Associate the Auth Method: user_login and GitLab username
Sub Claims:It is mandatory to add an appropriate Sub Claim based on the claims available in the GitLab documentation to prevent access of unauthorized users.
Set Read and List permissions only for Secrets & Keys.
Example Usage
In this example, we are updating our GitLab repo which triggers a job that runs a set of commands in order to update a MySQL database. For this to work, you will need to have:
- A MySQL database and host address
- A MySQL Dynamic Secret Producer
- Akeyless Gateway
- Access ID
- Private Key for SSH saved as Static Secret
Open your GitLab repo and make sure you have a yaml file named .gitlab-ci.yml and update it with the below code.
GitLab Version 15 and higherStarting from v15 GitLab supports
CI_JOB_JWT_V2. For older versions you can use the legacy environmentCI_JOB_JWTinstead.In GitLab v16 and above, CI_JOB_JWT_V2 is replaced by ID tokens.
The image is
akeyless/ci_basewhich is a public docker image based onruby:2.4that contains the Akeyless CLI as well as other essential components.
Important information about this fileIn the below file, you should change the following to your own Akeyless secret names:
Make sure to add your
Access IDin theexport TOKENline.
jeremy-demois the RSA private key
jeremy-demo.pemis the private key - you can call the file whatever you want, just make sure to update it in both places
mysqlDSis the MySQL Dynamic Secret ProducerFor the "employee.sh" file, make sure you have your database and table set and change the info to match yours.
stages:
  - deploy-stage

deploy-stage:
  stage: deploy-stage
  image:
    name: akeyless/ci_base:latest
  before_script:
    - export DATA=akeyless://mysqlDS # Dynamic Secret Producer for MySQL
    - export RSA=akeyless://jeremy-demo # Static secret which holds the private key
    - export REMOTE_HOST=akeyless://remote-host # Static secret with host of MySQL EC2 instance
    - export TOKEN=$(akeyless auth --access-id <your_access_id> --access-type jwt --jwt $CI_JOB_JWT_V2) # Authenticate with GitLab
    - source ~/.akeyless/akeyless_env.sh # Script to fetch secrets above from your Akeyless account
  script:
    - export LC_user=$(echo $DATA | jq -r .id) # Grab username of MySQL Dynamic Secret
    - export LC_pass=$(echo $DATA | jq -r .password) # Grab password of MySQL Dynamic Secret
    - echo $RSA | base64 --decode >> jeremy-demo.pem # Add RSA private key into PEM file in container
    - chmod 600 jeremy-demo.pem # Give private key correct permissions
    - scp -o StrictHostKeyChecking=no -i "jeremy-demo.pem" employee.sh ubuntu@$REMOTE_HOST:~/. # SSH and copy 'employee.sh' file into remote EC2 Host
    - ssh -o "SendEnv LC_*" -o StrictHostKeyChecking=no -i "jeremy-demo.pem" ubuntu@$REMOTE_HOST -t "bash employee.sh" # SSH into remote EC2 Host again and update DB
    - echo "Database Employees updated!"
Here's what is happening in this workflow:
- We pull the Akeyless _ci_base_ Docker image.
- Export our Dynamic Secret, which we grab from our MySQL Dynamic Secret Provider, (see video on creating and using dynamic secrets as an Env Variable.
- Export our private key, by running `akeyless get secret value`, where the private key is sitting within our Akeyless account, as an Env Variable.
- Export the remote host by running `akeyless get secret value` grabbing the remote host secret from Akeyless that I saved, which is the host where our MySQL database is located.
- Authenticate to Akeyless by running `akeyless auth` with the Access ID we stored as an environment variable.
- Run the `akeyless-env.sh` script which will fetch the above secrets from your Akeyless account.
- Next, we run the `script seciton where we fetch the secrets and update the MySQL database by running a list of commands as follows:
- Grab just the temp username from this Dynamic secret using `jq` because this Dynamic Secret Value gives us both an ID as well as a password. So we're going to split those pieces of information.
- Next, we grab the temp password
- We then need to decode our base64 encoded private key and put it into a pem file which we then give the proper permissions.
- Then, we run our SSH copy command to copy the employee.sh file into the remote host which is used to update the database.
- Next, SSH into the remote host again sending the values of the username and the password in order to log in and then run the `employee.sh` file which will have those environment variables for the username and password to log into the MySQL database.
- And we just echo that the database called `employees` was updated.
Next, add the employee.sh file into your GitLab repo as well which will log into the database and add a new row:
#!/bin/bash
mysql -u$LC_user -p$LC_pass -e 'USE Employees; INSERT INTO employees (First_Name,Last_Name) VALUES ("Wade","Wilson");'
Once you commit this file, a new job will run and you should see something similar to the following output:
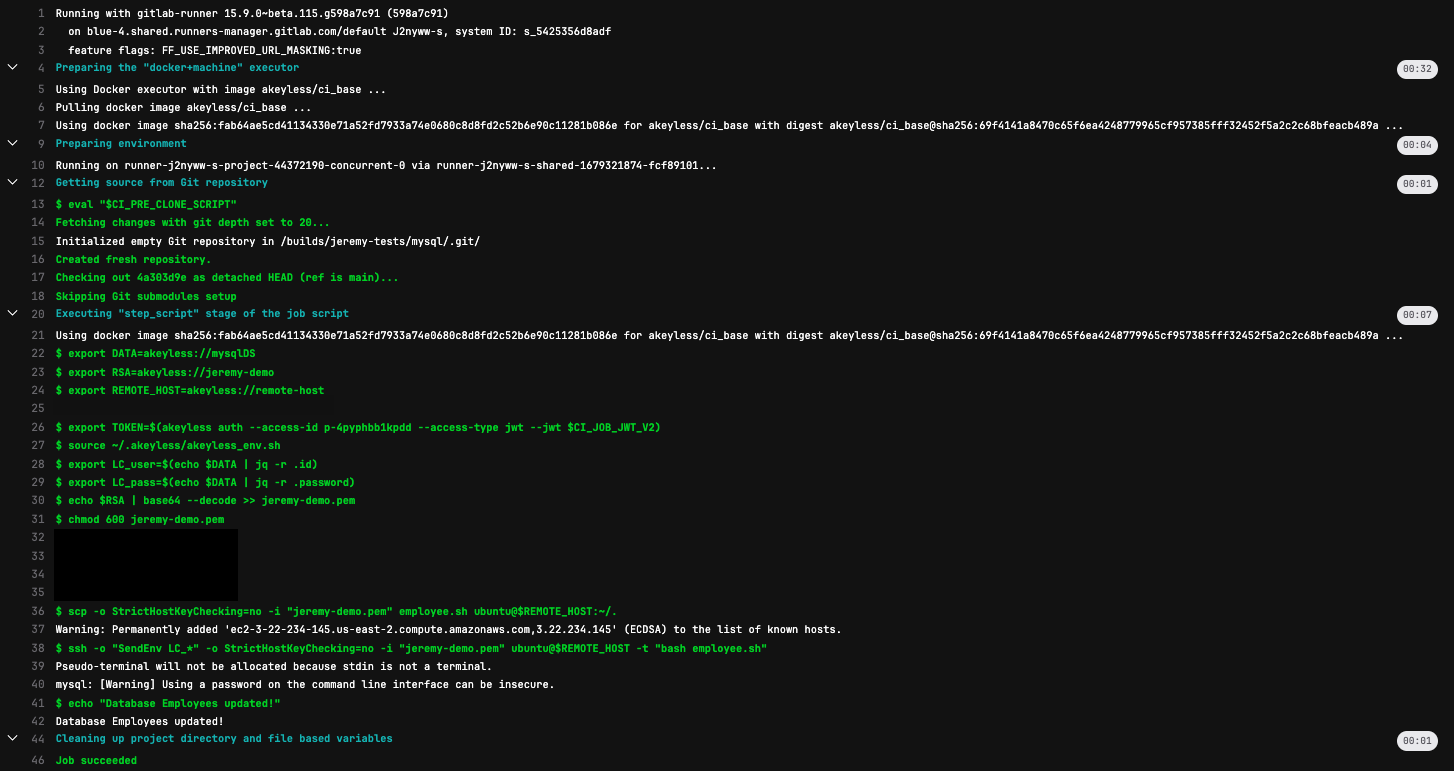
You can head over to your database and login with your admin or temporary credentials to see the update was successful:
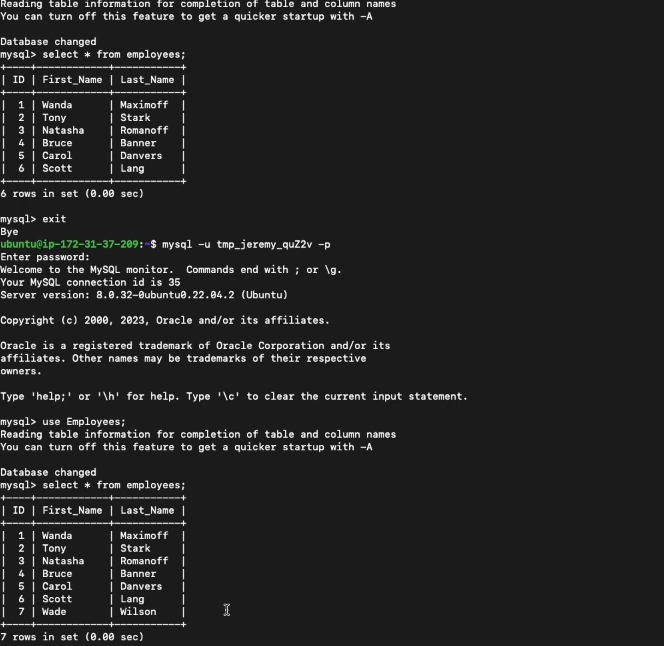
Note that the above image shows the previous state of the database and then the updated state with the new row added.
Updated over 1 year ago