Universal Secrets Connector - Managing Secrets in AWS, GCP, K8s, and more
Deeper DiveFor more in-depth information, check out our detailed documentation on the following topics:
Universal Secrets ConnectorAWS Universal Secrets Connector
Need any help?If something in this tutorial isn't working as expected, feel free to contact our support team via Slack.
Below is a text-only guide for users based on the above video
What is a Universal Secrets Connector?
While Akeyless is built to internally store, manage, and protect your secrets, it can also be used to manage secrets stored on other Secret Management services like AWS, Azure, GCP, or K8s. This can be done by creating a Universal Secrets Connector, that utilizes Targets in order to create local "windows" into the related services, effectively letting you manage them indirectly.
After connecting to your Universal Secrets source, you will be able to manage them from Akeyless, including viewing, adding, updating, and deleting secrets. The exact secret information that can be displayed in Akeyless varies between providers according to their unique attributes.
In this demo, we will show how to manage AWS Secret Manager secrets as well as Kubernetes secrets.
Managing AWS Secret Manager secrets using Universal Secrets Connector
Using Akeyless Console
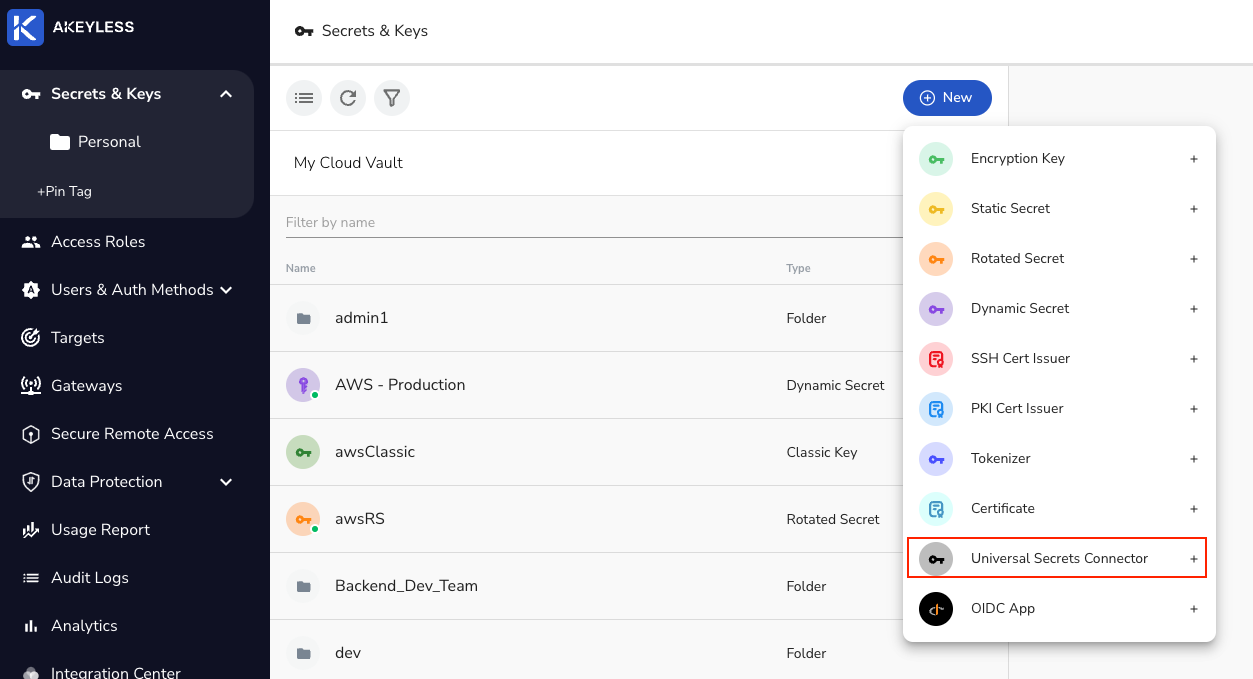
Go to Secrets & Keys and choose New -> Universal Secrets Connector.
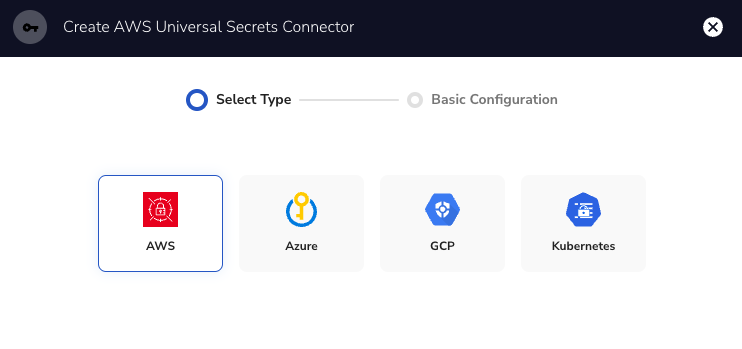
Then, choose the service you want to manage secrets from and click Next.
Important NotesCloud Platform USCs are available per region. On Kubernetes, they are available per namespace.
For Kubernetes USCs, a
clusterRoleandclusterRoleBindingwith correct permissions is necessary.
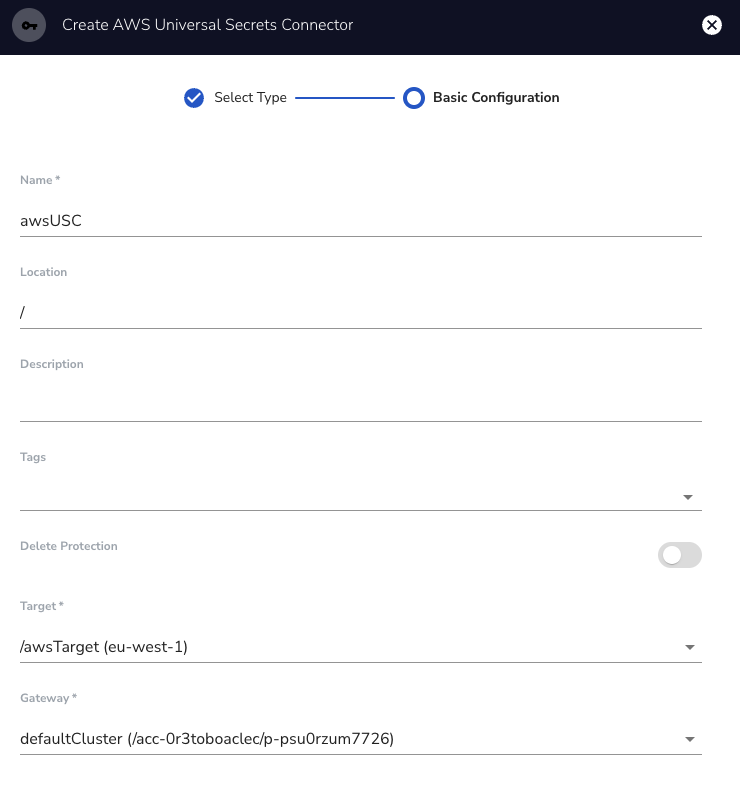
Next, enter the Name, Target, and Gateway and click Finish.
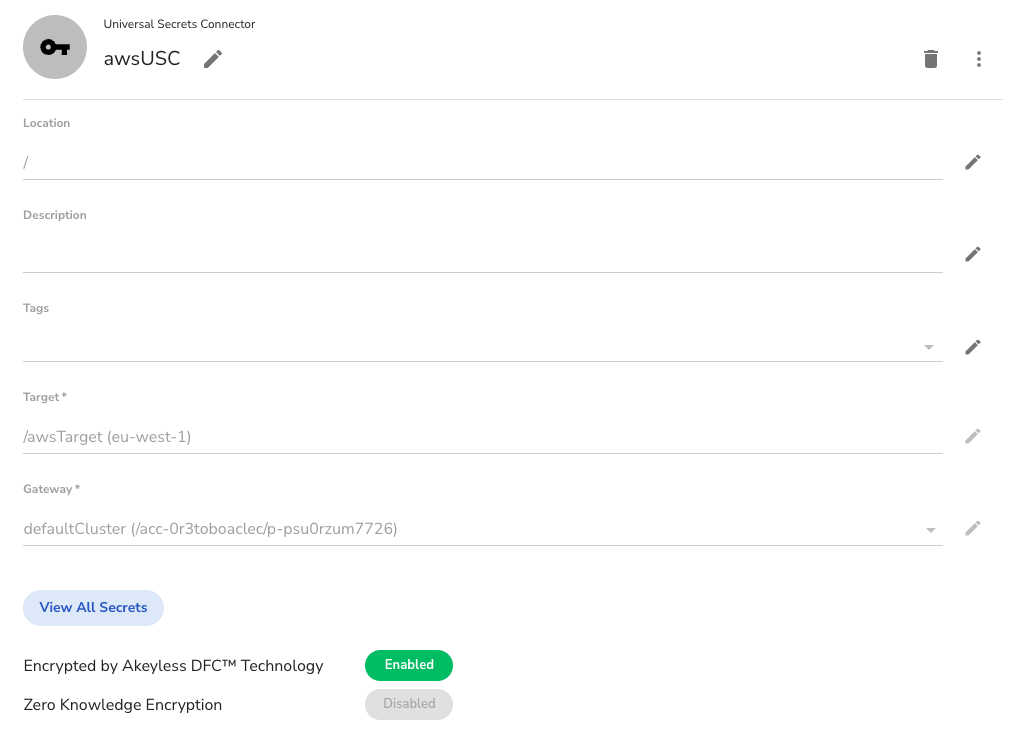
You will then see the details of the Universal Secrets Connector (USC) on the right side and click on the "View All Secrets" button.
You will see a new pane open up that will show your secrets.

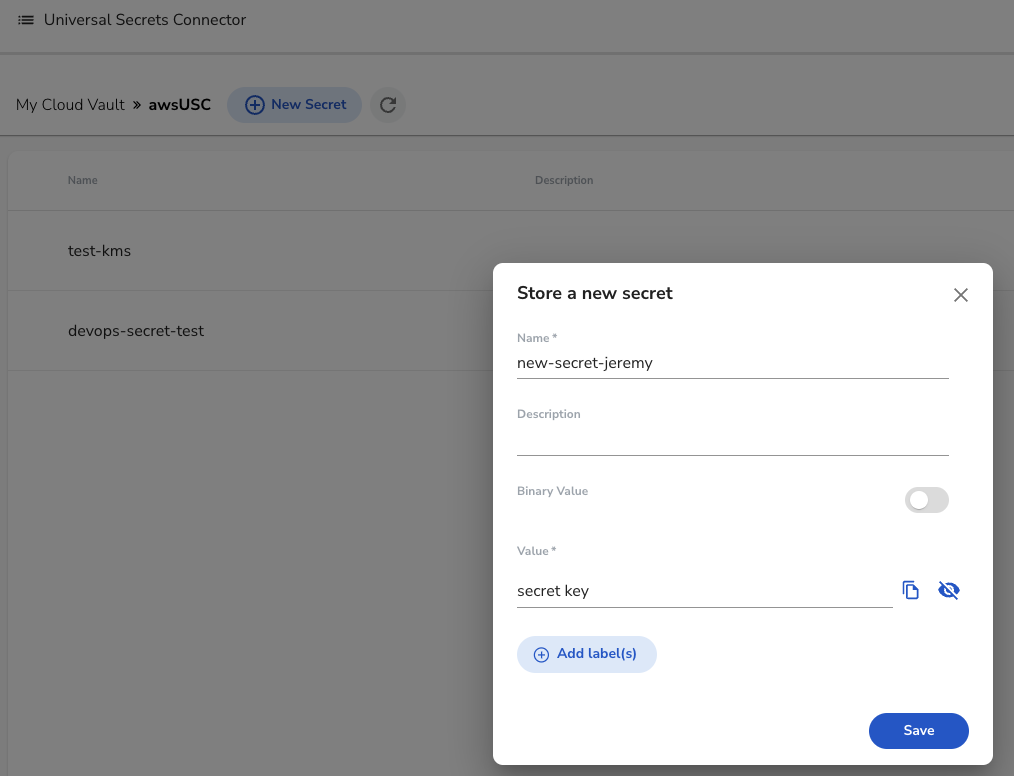
Next, choose New Secret and give it a Name and Value, then click Save.
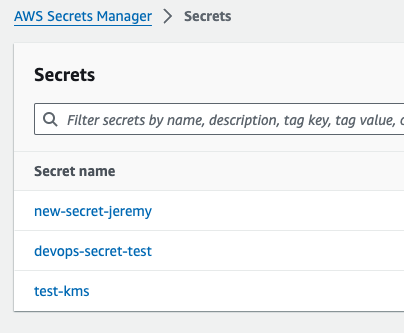
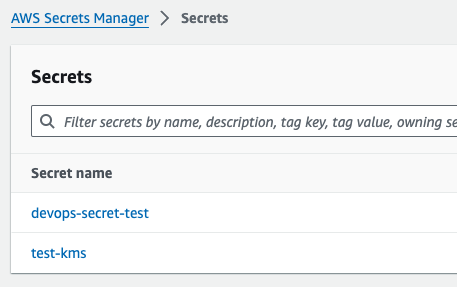
Go to your external service (in this case, AWS) and you will see the new secret created.
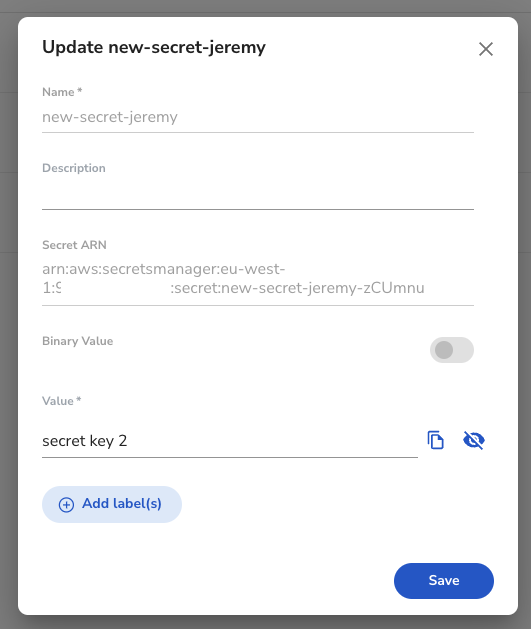
To Update the secret value, in Akeyless, click on the 3 dots and choose Update.

Then, update your secret value by clicking on the eye symbol.
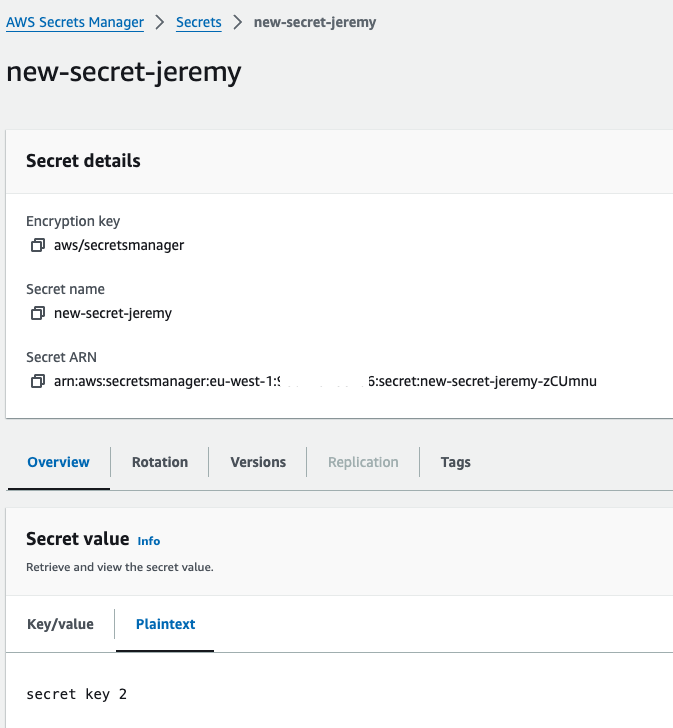
You can confirm the change in AWS as well.
To delete the secret, in Akeyless, click on the 3 dots and choose Delete and the enter the name of the secret.

Go back to your external service and confirm the secret was deleted.
Using Akeyless CLI
To create a USC, use the following command and add the Name and Target.
akeyless create-usc -n <name> -a <target name> -u <gateway-url:8000>To view the secrets saved on your USC, use the following command.
akeyless usc list -n <usc name> -u <gateway-url:8000>The output should look similar to this.
{
  "secrets_list": [
    {
      "secret_id": "<secret id>",
      "name": "<secret name>",
      "created": "<timestamp>",
      "type": "<type>",
      "status": <activity status, true/false>
    }
  ]
}
To view a secret from your USC, use the following command.
akeyless usc get -n <usc name> -s <secret id or name> -u <gateway-url:8000>The output should look similar to this.
{
  "value": "<base64 encoded value>",
  "metadata": {
    "created": "<timestamp>",
    "updated": "<timestamp>"
  }
}
To create a new secret in your USC, use the following command.
akeyless usc create -n <usc name> -s <new secret name> -v <secret value> -u <gateway-url:8000>To update an existing secret in your USC, use the following command.
akelyess usc update -n <usc name> -s <secret id or name> -v <new secret value> -u <gateway-url:8000>To delete an existing secret in your USC, use the following command.
akelyess usc delete -n <usc name> -s <secret id or name> -u <gateway-url:8000>Updated about 1 year ago
