
Akeyless as an External Multi-Cloud KMS
Deeper DiveFor more in-depth information, check out our detailed documentation on the following topics:
External KMSClassic KeysKey Rotation
Need any help?If something in this tutorial isn't working as expected, feel free to contact our support team via Slack.
Below is a text-only guide for users based on the above video
What is Akeyless KMS?
The Akeyless Key Management System (KMS) allows organizations to simplify the management and distribution of encryption keys in Multi-Cloud and Hybrid environments using Classic Keys.
A Classic Key is an encryption key managed in the Akeyless KMS that can be shared with a cloud KMS or be used as an encryption key to protect your secrets, enabling you to Bring Your Own Key (BYOK) to the Akeyless Platform.
The Akeyless KMS manages the key lifecycle, including secure key generation and storage, full role-based access control, and logging and reporting of key usage. This enables you to maintain centralized control of your keys in Akeyless while using the cryptographic capabilities of external cloud providers.
When you share a key with one of the supported cloud KMS providers, a copy of the key material is securely transferred in accordance with the key import specification of the KMS provider.
AWS KMS Integration
First, create an AWS Target or use one you already created. You can see how to do this in a previous video tutorial here.
Then, create a Classic Key in Akeyless either via the UI or CLI.
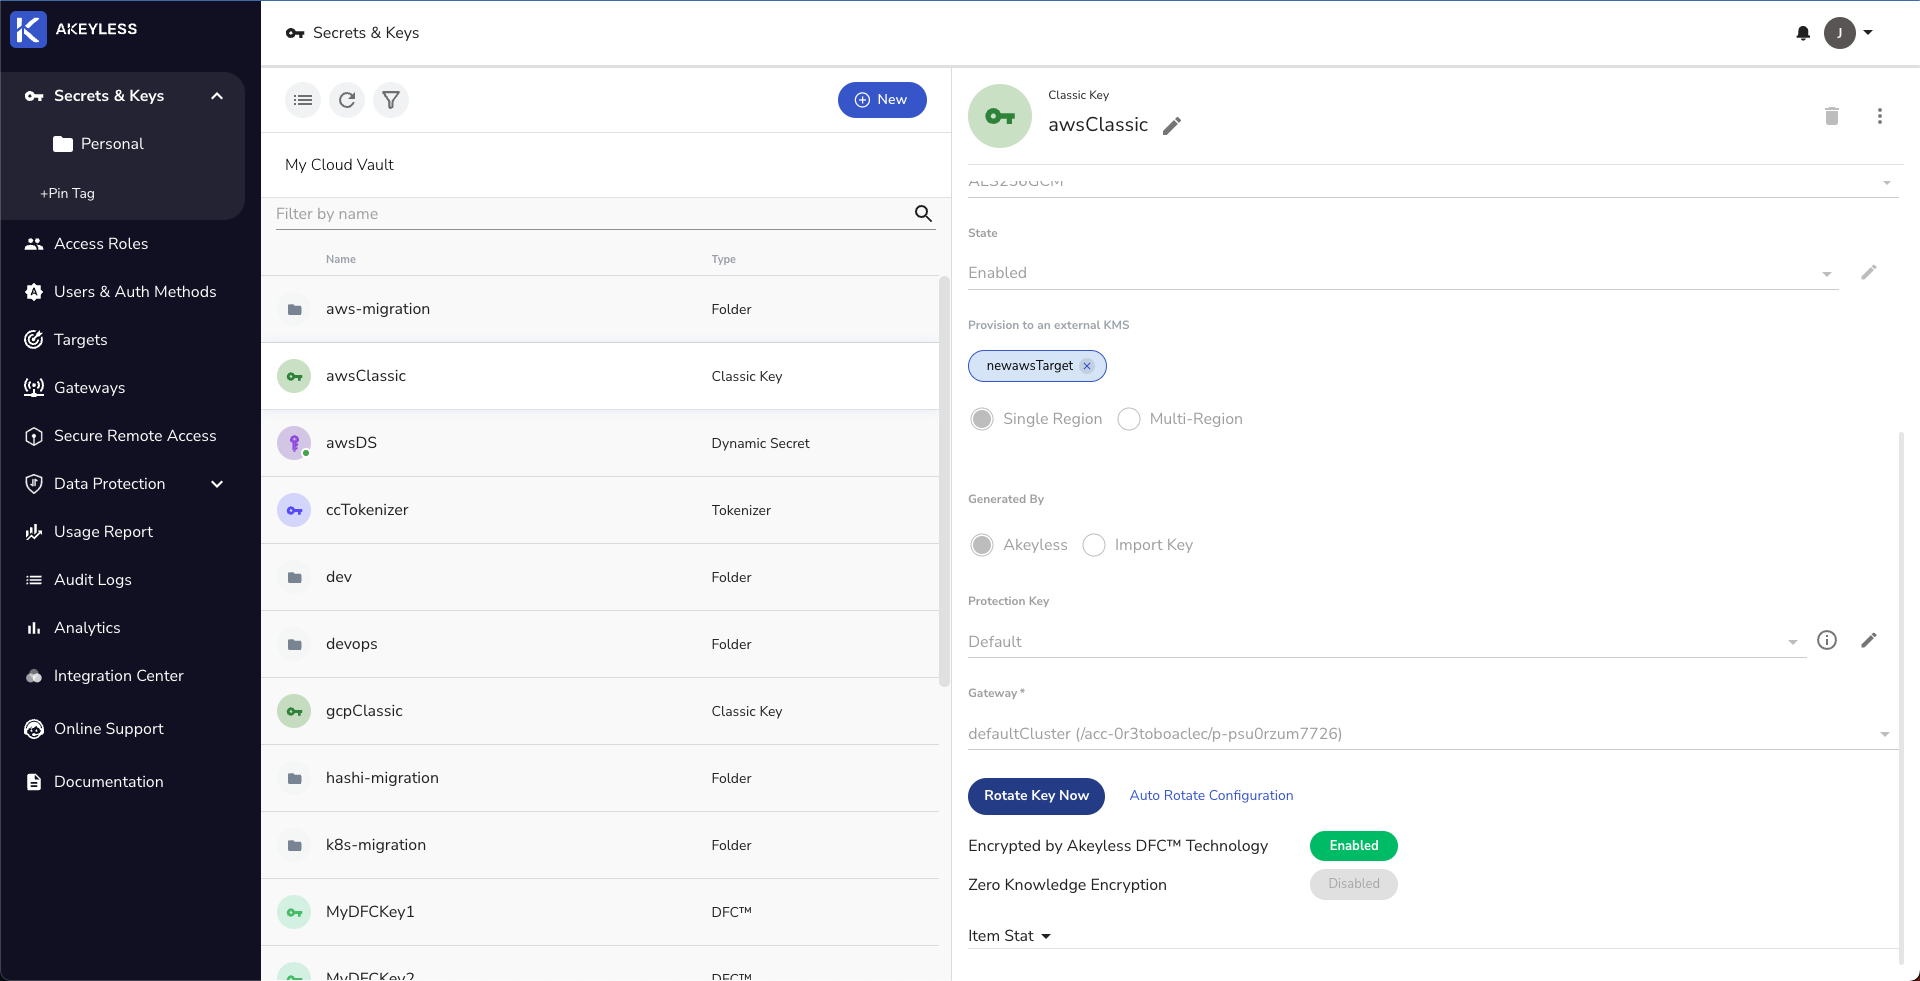
Creating a Classic Key via the UI
Choose 'New' -> 'Encryption Key' -> 'Classic' and enter the relevant details.
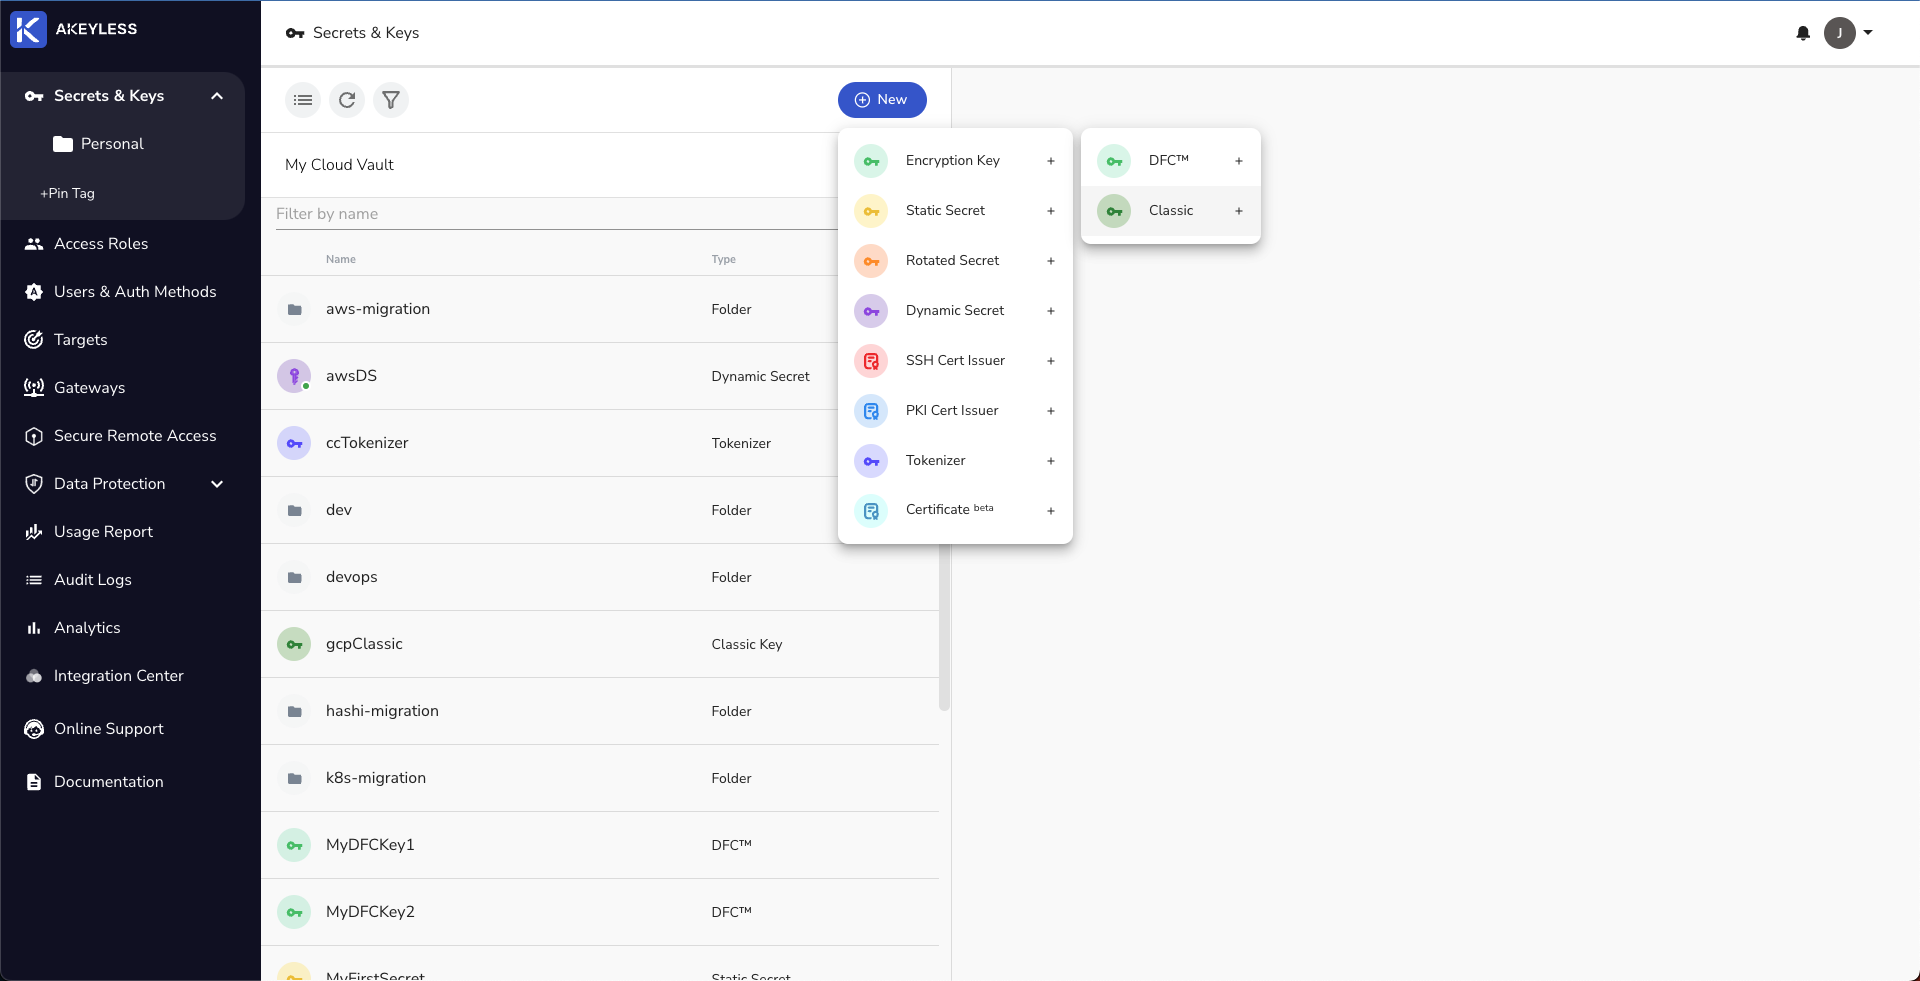
Once done, click 'Finish'.

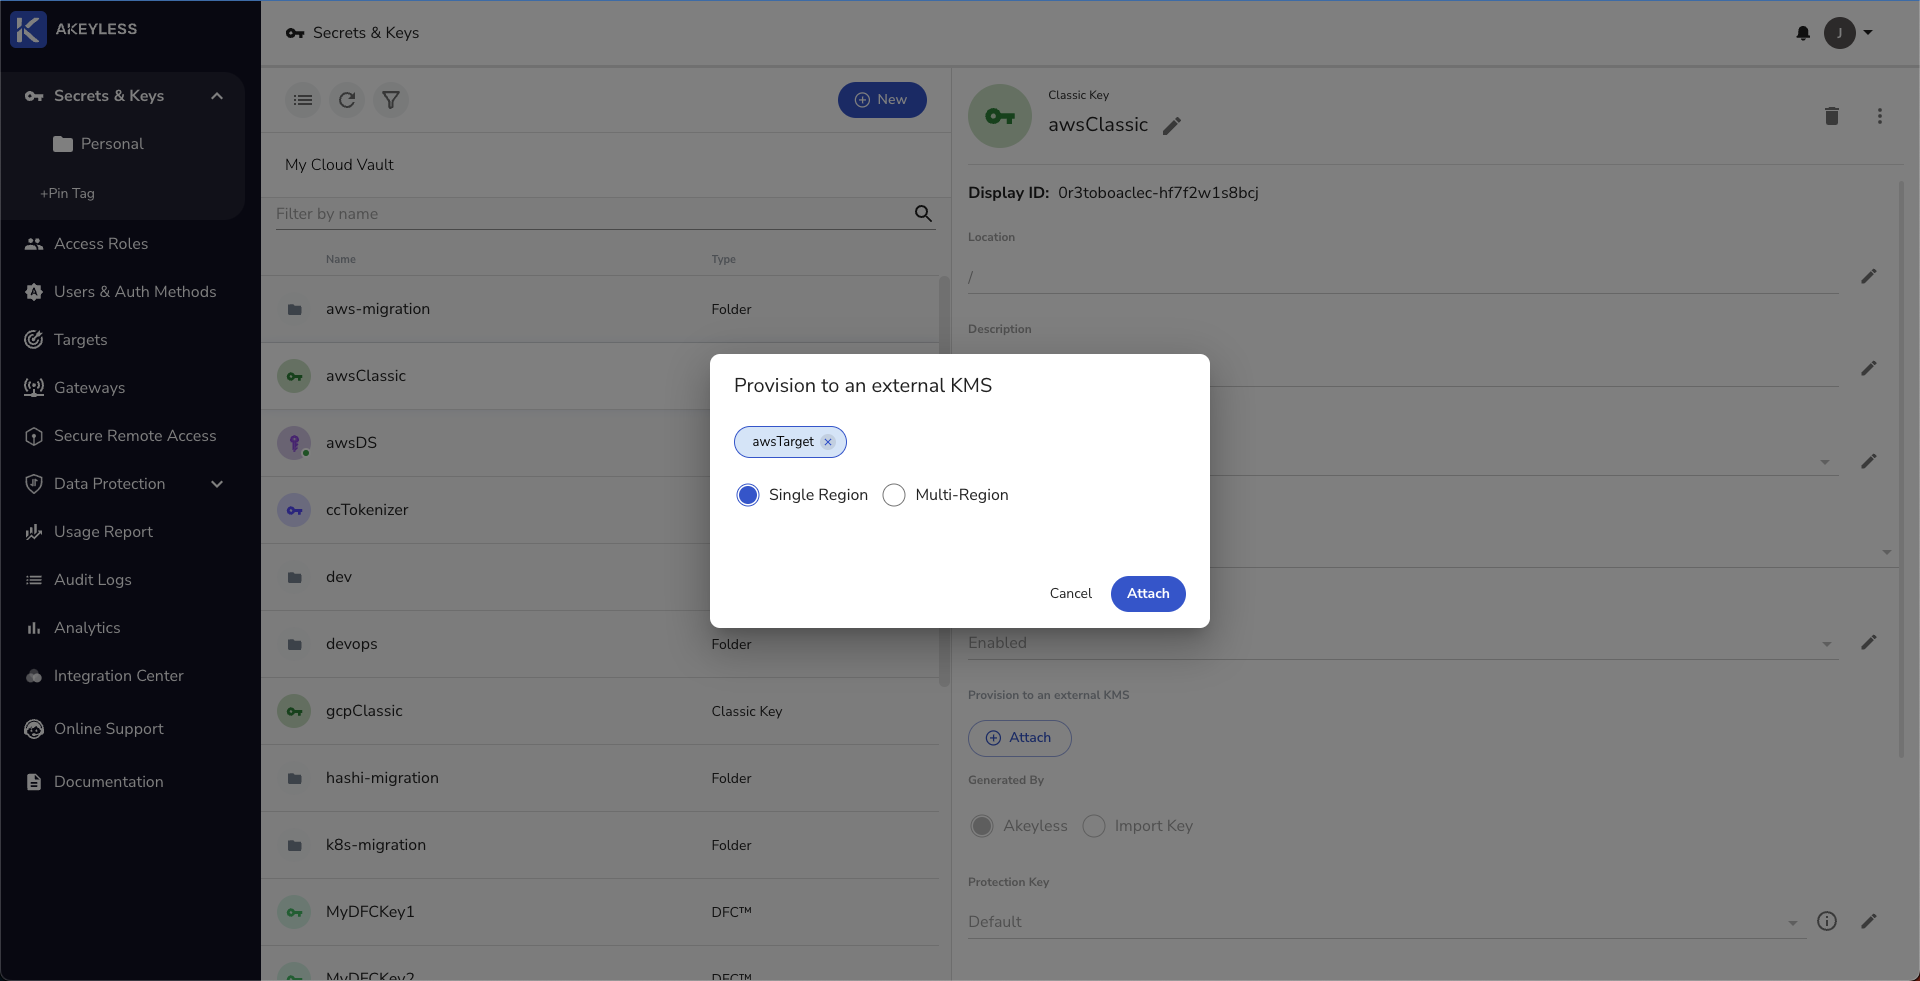
Next, click the 'Attach' button to connect a Target with the Classic Key and choose 'Single Region' or 'Multi Region'. Then click 'Attach'.
Creating a Classic Key via the CLI
Copy and paste the following command into your Terminal:
akeyless create-classic-key --name [name-of-your-classic-key] --alg AES256GCM --gateway-url = https://[your-gateway-url]:8000 # For Multi-Region, add '--multi-region=true --regions [add-region-names-here]'Next, attach a Target using the following command:
akeyless assoc-target-item --target-name [name-of-your-target] --name [name-of-your-classic-key]
NoteDifferent cloud providers demand additional parameters. To see the relevant parameters, go to the External KMS Integration docs page.
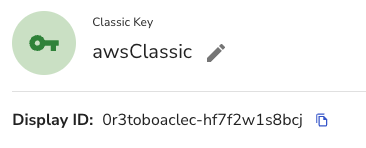
Once you associate a Target to the Classic Key, a copy of the key material is securely transferred to the AWS KMS in accordance with its key import specification.
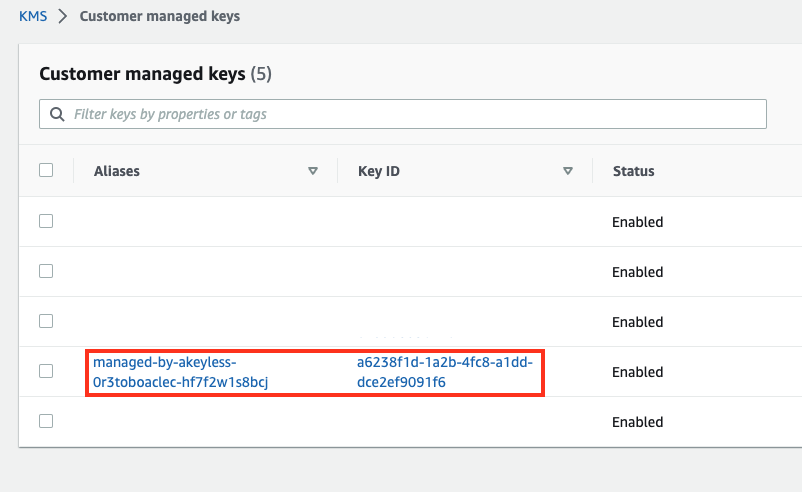
You can see it, by finding the Classic Key Display ID in Akeyless and the searching for it within the AWS KMS.
Here is what it looks like in AWS.
Rotate a Classic Key in AWS
To rotate a key from the UI, simple click the 'Rotate Key Now' button.
Or, from the CLI, run the following command:
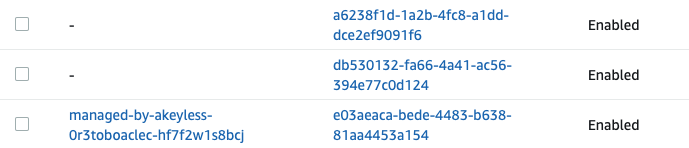
akeyless rotate-key -n [your-classic-key-name]In AWS, when Encryption Keys are rotated, a new Alias of the key is created. You will therefore see a new Alias created each time you rotate.
Here is what happens after one rotation.

Here is what happens after two rotations.
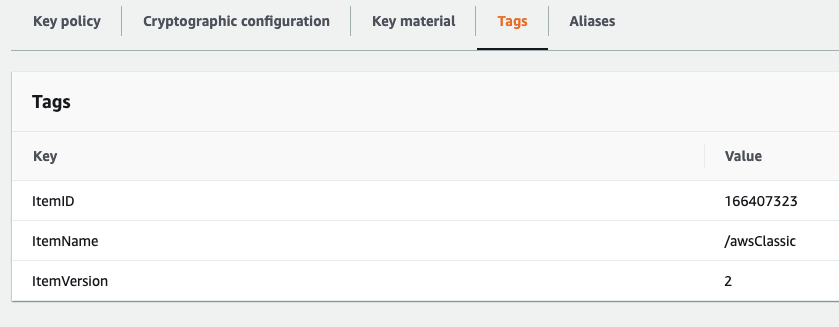
And you can see versions within the key itself under 'Tags'.
Google KMS Integration
First, create a GCP Target or use one you already created. You can see how to create a target in a previous video tutorial here.
Then, create a Classic Key in Akeyless either via the UI or CLI.
ImportantMake sure you have a GCP Keyring to target and remember to give the GCP Target the cloud KMS admin permissions to manage the keyring.
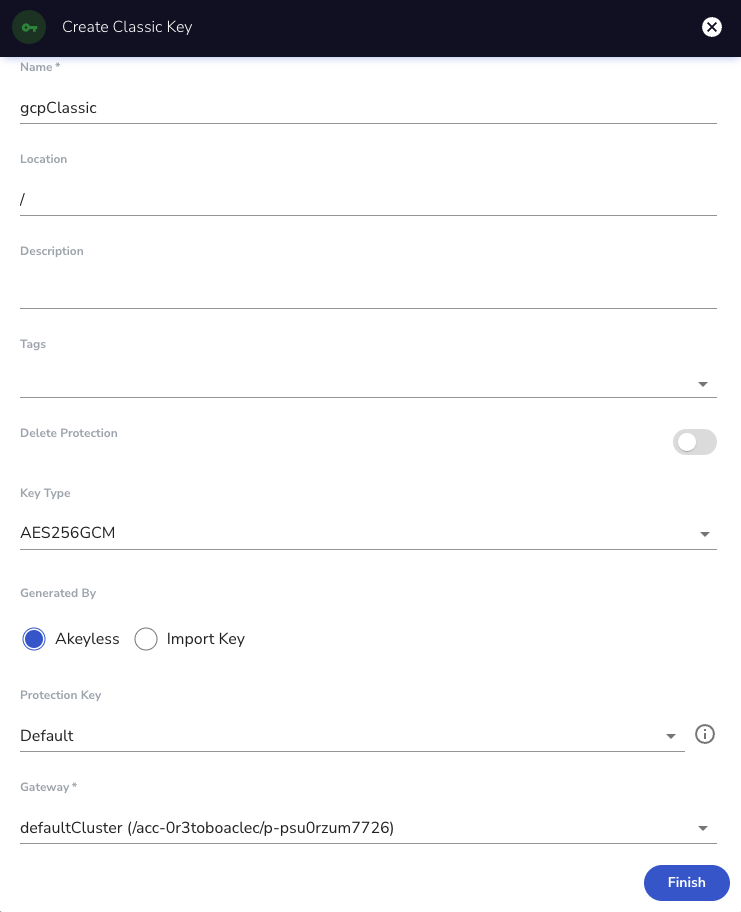
Creating a Classic Key via the UI
Choose 'New' -> 'Encryption Key' -> 'Classic' and enter the relevant details.
Once done, click 'Finish'.
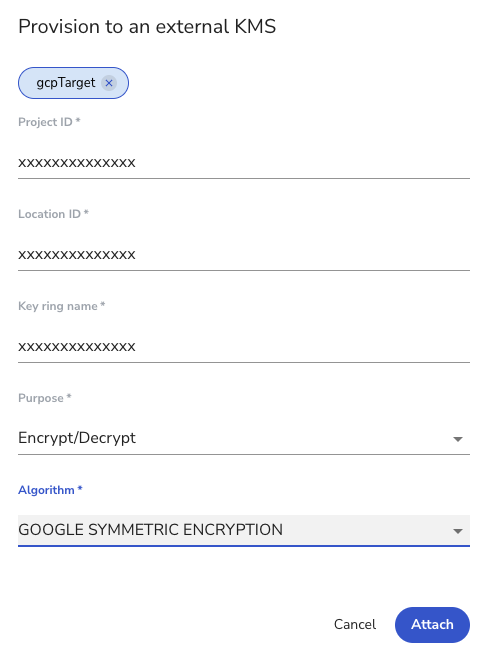
Next, click the 'Attach' button to connect a Target with the Classic Key and add your 'Project ID', 'Location ID', 'Keyring Name', 'Purpose', and 'Algorithm'. Then click 'Attach'.
Creating a Classic Key via the CLI
Copy and paste the following command into your Terminal:
akeyless create-classic-key --name [name-of-your-classic-key] --alg AES256GCM --gateway-url = https://[your-gateway-url]:8000Next, attach a Target using the following command:
akeyless assoc-target-item --target-name [name-of-your-target] --name [name-of-your-classic-key] --project-id [gcp-project-id] --location-id [gcp-kms-location] --keyring-name [name-of-your-keyring] --purpose [ENCRYPT_DECRYPT, MAC] --kms-algorithm [choose-option-from https://docs.akeyless.io/docs/gcp-kms]
NoteDifferent cloud providers demand additional parameters. To see the relevant parameters, go to the External KMS Integration docs page.
Once you associate a Target to the Classic Key, a copy of the key material is securely transferred to the GCP KMS in accordance with its key import specification.
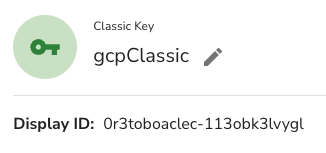
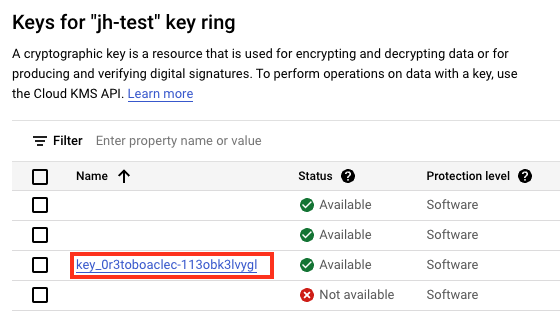
You can see it, by finding the Classic Key Display ID in Akeyless and the searching for it within the GCP KMS.
Here is what it looks like in GCP.
Rotate a Classic Key in GCP
To rotate a key from the UI, simple click the 'Rotate Key Now' button.
Or, from the CLI, run the following command:
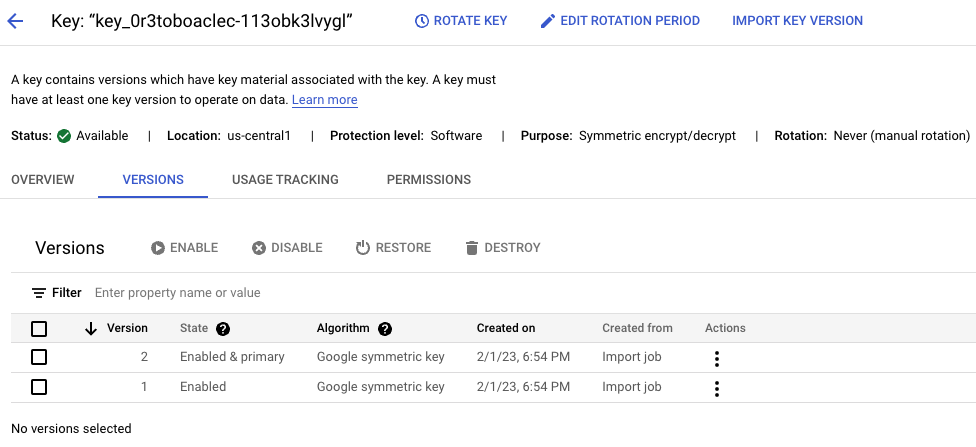
akeyless rotate-key -n [your-classic-key-name]You can see versions of the key by clicking on the Key Name and then 'Versions'.
Updated over 1 year ago