
Accessing a Database via the CLI through Remote Access
Deeper DiveFor more in-depth information, check out our detailed documentation on the following topics:
Secure Remote AccessSecure Remote Access BastionDatabase Secure Remote Access
Need any help?If something in this tutorial isn't working as expected, feel free to contact our support team via Slack.
Below is a text-only guide for users based on the above video
Akeyless connect provides you with secure CLI access to resources or a secure tunnel from any UNIX terminal.
Prerequisites
To use Akeyless Connect you need:
- Akeyless CLI v1.42.0 or higher.
- An SSH certificate issuer for certificate authentication.
- A Secure Remote Access Bastion.
- OpenSSH v7.2 or higher on target servers.
SSH Certificate Issuer Setup
When a user connects to an application through the Remote Access Bastion, they first use the SSH Certificate to connect to the Bastion. From there, the Bastion connects to the resource. Therefore, it is required that the user is given read access to the SSH Certificate in order to make that first connection.
So, make sure you go to your Access Role and update the Secrets & Keys section to ensure the user has read access as well (not just list) to the SSH Certificate.

Set Up Akeyless Connect
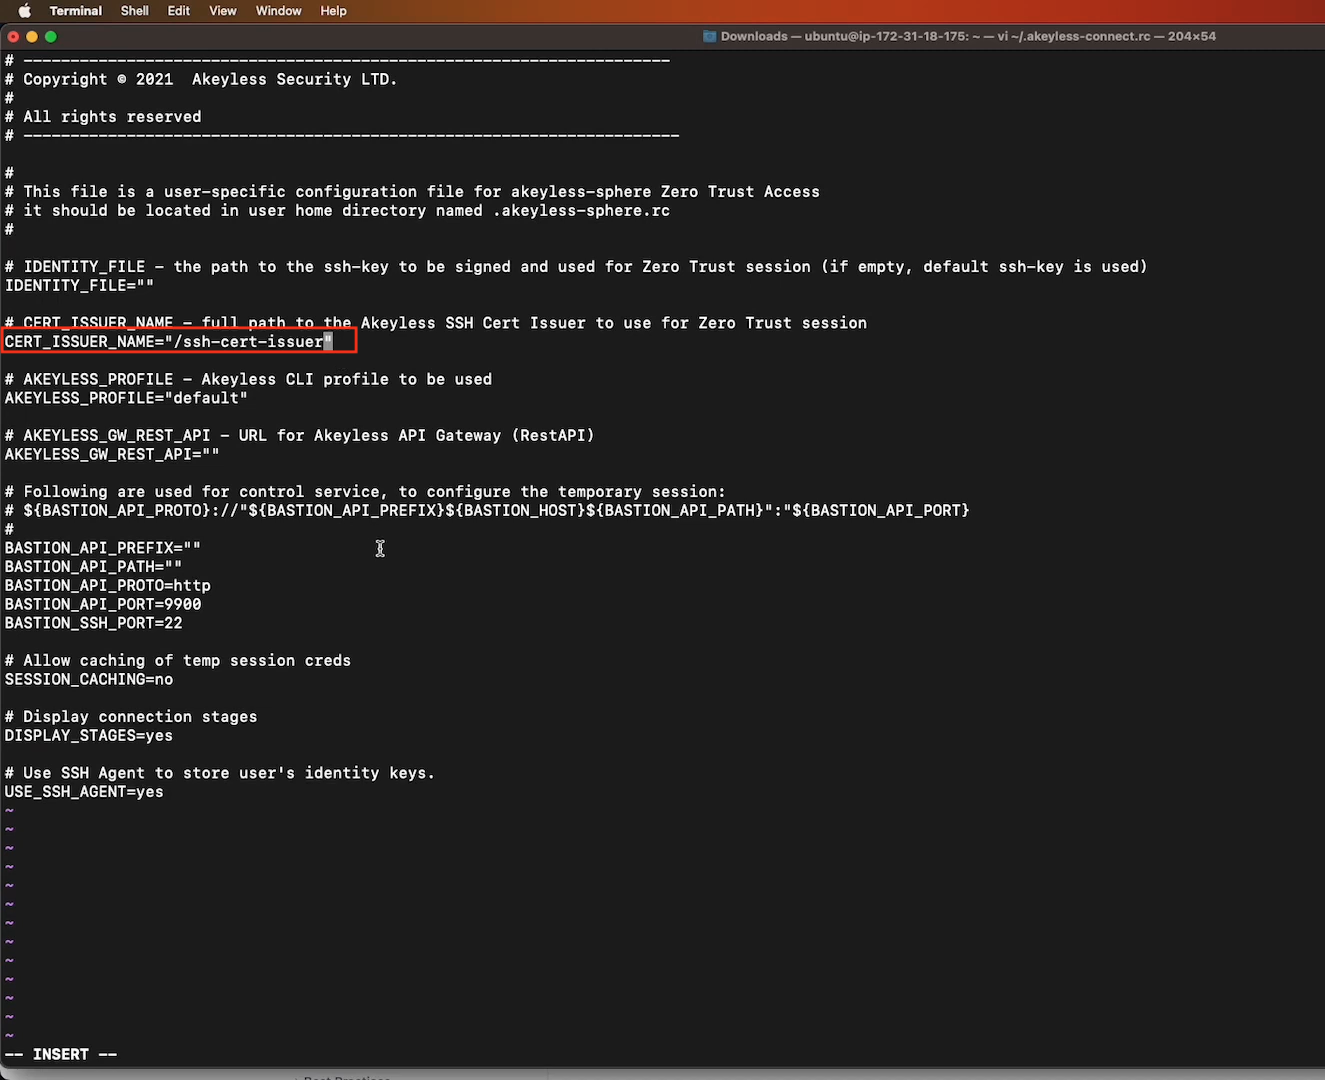
Create a resource file called ~/.akeyless-connect.rc and copy the below code into it. Then edit (at minimum) as below:
CERT_ISSUER_NAME: The full path to your SSH Certificate Issuer as created previously based on this video.
# ---------------------------------------------------------------------
# Copyright © 2023  Akeyless Security LTD.
#
# All rights reserved
# ----------------------------------------------------------------------

#
# This file is a user-specific configuration file for akeyless-sphere Zero Trust Access
# it should be located in user home directory named .akeyless-sphere.rc
#

# IDENTITY_FILE - the path to the ssh-key to be signed and used for Zero Trust session (if empty, default ssh-key is used)
IDENTITY_FILE=""

# CERT_ISSUER_NAME - full path to the Akeyless SSH Cert Issuer to use for Zero Trust session
CERT_ISSUER_NAME=""

# AKEYLESS_PROFILE - Akeyless CLI profile to be used
AKEYLESS_PROFILE="default"

# AKEYLESS_GW_REST_API - URL for Akeyless API Gateway (RestAPI)
AKEYLESS_GW_REST_API=""

# Following are used for control service, to configure the temporary session:
# ${BASTION_API_PROTO}://"${BASTION_API_PREFIX}${BASTION_HOST}${BASTION_API_PATH}":"${BASTION_API_PORT}
#
BASTION_API_PREFIX=""
BASTION_API_PATH=""
BASTION_API_PROTO=http
BASTION_API_PORT=9900
BASTION_SSH_PORT=22

# Allow caching of temp session creds
SESSION_CACHING=no

# Display connection stages
DISPLAY_STAGES=yes

# Use SSH Agent to store user's identity keys.
USE_SSH_AGENT=yes
Here is what it looks like:
Network Security Best PracticeIt's best practice to ensure that the your network policies give users access through the Bastion only.
Bastion-Specific AccessIt's also good security practice to specify which Bastion(s) users have access to. This can be done by editing the
values.yamlfile of the Secure Remote Access Bastion and adding the specific Bastion's Kubernetes Service External-IP with port 8888. Then, run thehelm upgradecommand to update the deployment.For details on this, see the video at the top of this page starting from 3:25 into the video.
Using the Akeyless Connect Command
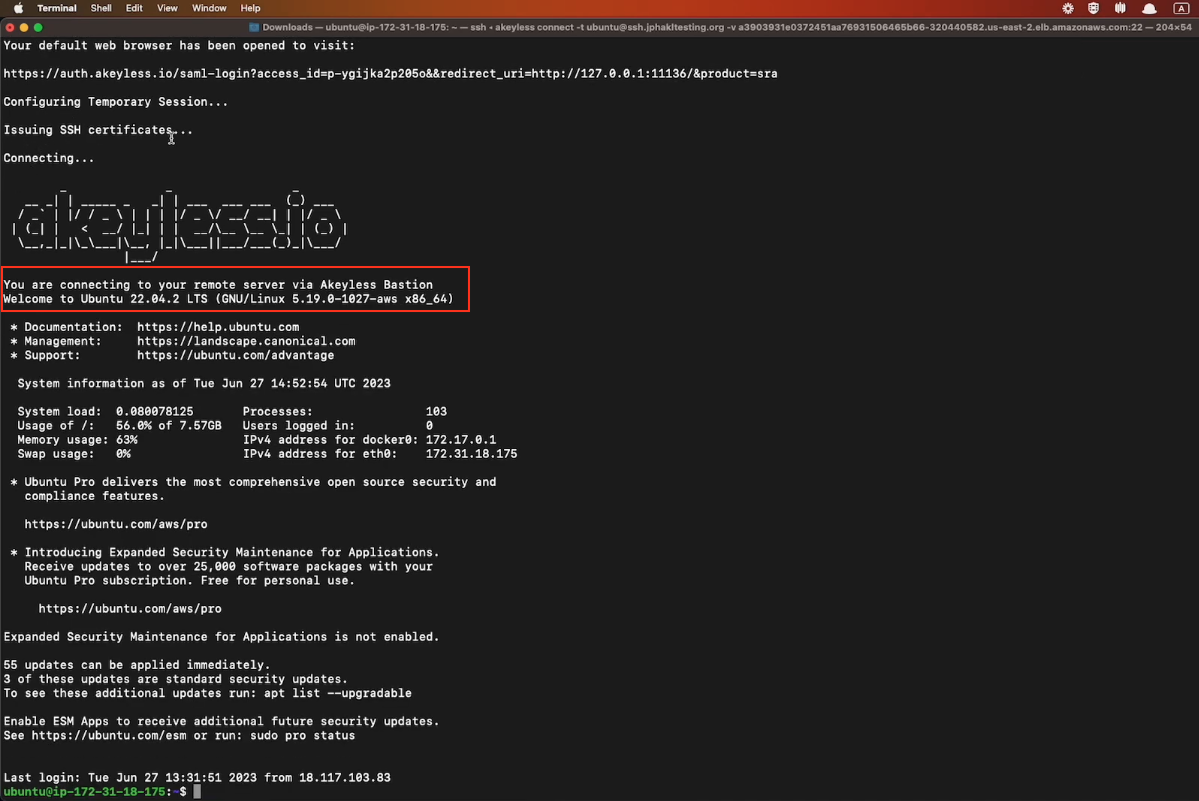
Accessing a Remote Machine using Akeyless Connect
In this first example, we will SSH into another machine through the Akeyless Secure Remote Access Bastion. Run the following command in your terminal, where:
-t: The user@host:port of the remote machine.
-v: The hostname (External-IP) of your Secure Remote Access Bastion with port 22.
-c: (Optional) The path to your SSH Certificate Issuer inside Akeyless.
akeyless connect -t user@ssh-server[:port] -v <via-sra-bastion-ssh-service> -c "<Path to SSH Cert Issuer>"
SSH Certificate IssuerIf you already added your SSH Certificate Issuer inside your
.rcfile, as we did earlier in this tutorial, you do not need to explicitly add it in this command.
When you hit Enter, your session will be authenticated and you will be logged into the remote machine via the Akeyless Bastion without having seen or used any credentials.
Accessing a Remote Database using Akeyless Connect
In this second example, we will connect directly to the Postgres CLI using a Just-In-Time Dynamic Secret through the Akeyless Secure Remote Access Bastion. Run the following command in your terminal, where:
-t: The db-hostname:port of the remote database.
-v: The hostname (External-IP) of your Secure Remote Access Bastion with port 22.
-n: The path to your Dynamic Secret inside Akeyless.
akeyless connect -t <db-server>:<port> -v <via-sra-bastion-ssh-service>:<port> -n "<Path to DB Dynamic Secret>"Once you hit Enter, you will be logged directly into the Postgres CLI via the Akeyless Bastion and you can interact with it for the amount of time noted in your Dynamic Secret TTL and with the permissions granted. This too is done without the user having seen any credentials.
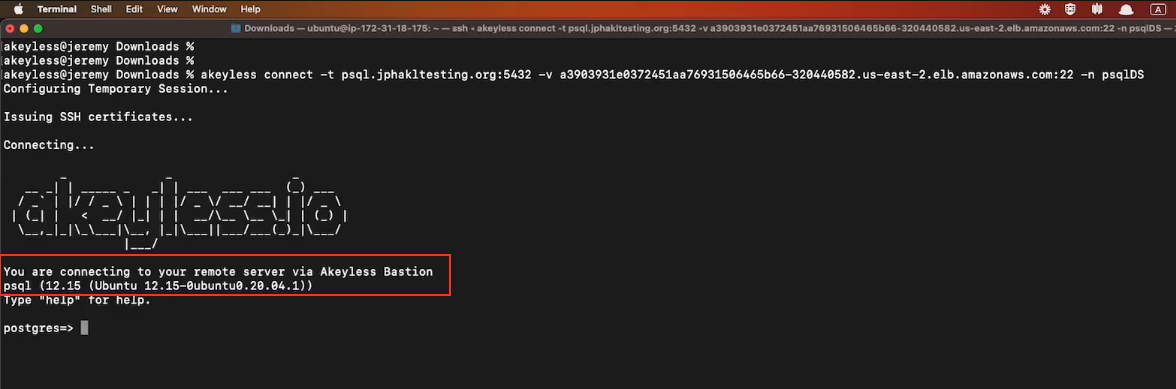
Once you exit the session, the temporary credentials are deleted.
Updated over 1 year ago