
Install and Configure Remote Access Bastion
Deeper DiveFor more in-depth information, check out our detailed documentation on the following topics:
Secure Remote AccessSecure Remote Access BastionSSH Remote Access
Need any help?If something in this tutorial isn't working as expected, feel free to contact our support team via Slack.
Below is a text-only guide for users based on the above video
What is Akeyless Secure Remote Access?
The Akeyless Secure Remote Access (SRA) solution, which sits on top of the Akeyless Secrets Orchestration Platform, enables seamless end-to-end connectivity directly to any resource or application you have access to, regardless of your location, and while using just-in-time dynamic secrets or rotated secrets to connect to your applications.
Users connect securely to resources via a Remote Access Bastion using their Identity Provider, either via the web-based portal, where they are shown a list of only the resources they have access to (image below), or by using the built-in akeyless connect command for secure CLI access using short-lived certificates.
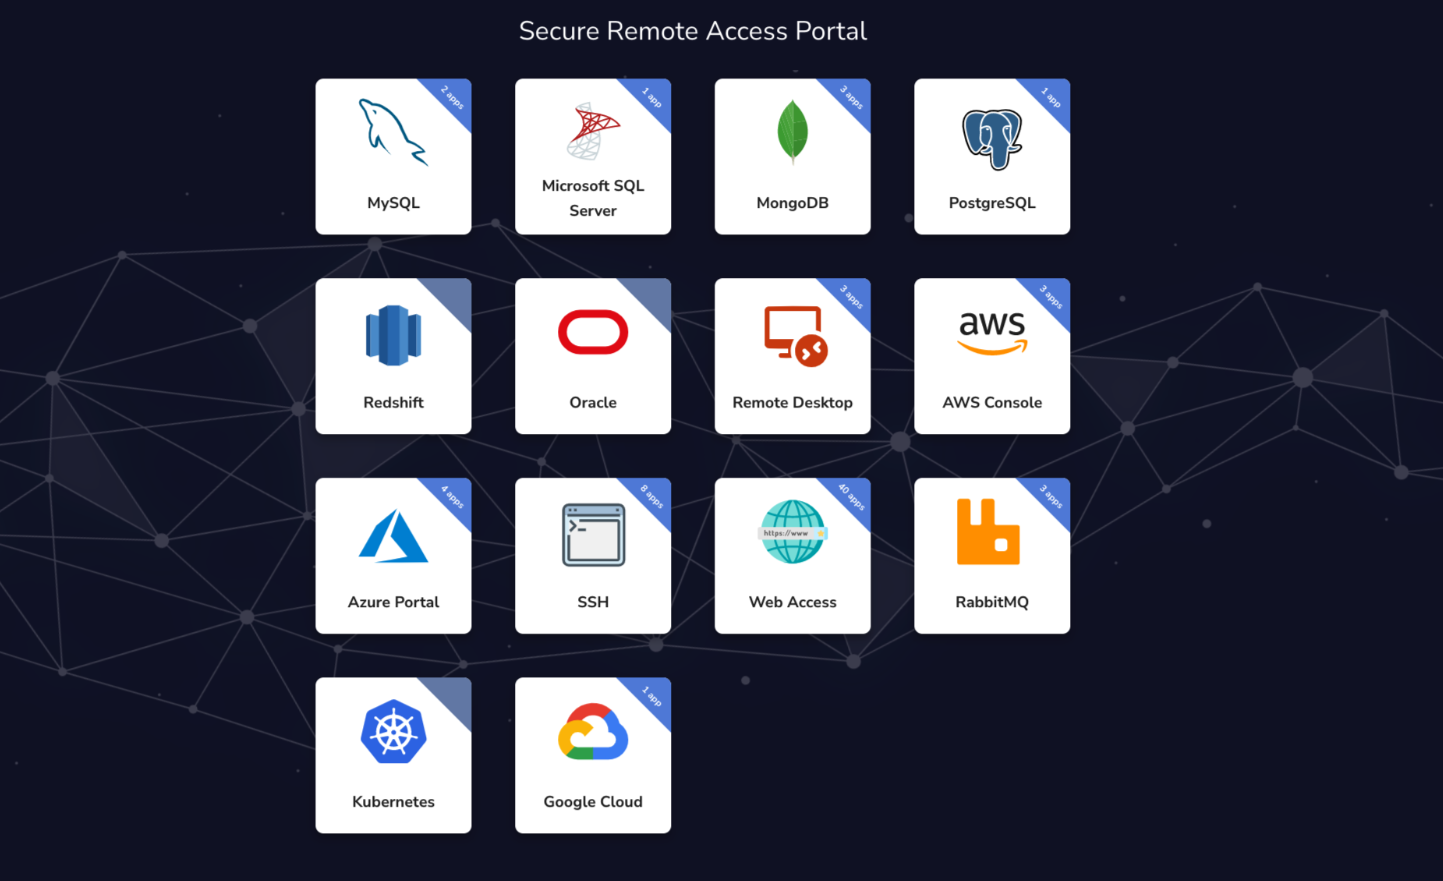
All this uses our granular role-based access controls, so users can only log into resources they have access to. We support various protocols, including SSH, RDP, SQL, Kubectl, and more.
Akeyless also provides full session management, with auditing and agentless recording capabilities, which can forward system logs to your log management solution.
Prerequisites
- Helm Installed
- K8s Installed
- SSH Certificate Issuer for CLI Access.
- Minimum 1 vCPU available with 1GB RAM per resource. This can be explicitly specified inside the chart for the Zero Trust bastion- ztbConfig section and the SSH bastion under sshConfig.
- Specific Network, Storage, and Horizontal Auto-Scaling information can be found in the docs.
Installing the Helm Chart on Kubernetes
This chart bootstraps the Secure Remote Access Bastion deployment on a Kubernetes cluster using the Helm package manager.
First, add the Akeyless Helm charts repository to your Helm repository list:
helm repo add akeyless https://akeylesslabs.github.io/helm-charts
helm repo update
Next, run the following Helm command to generate the values.yaml file locally:
helm show values akeyless/akeyless-sra > values.yamlThen we need to open that file with vi or your preferred text editor and edit the file to configure it:
vi values.yamlConfiguration
The changes we will make in the file are minimal for this demo. Here are the details we will configure:
Docker Creds and Gateway URL
To connect to Akeyless private repository, set the dockerRepositoryCreds field to access the Akeyless internal image and the relevant apiGatewayURL to point your Gateway REST API port 8080.
dockerRepositoryCreds: [To enable Secure Remote Access features you will have to get an access key to our private repository. Please contact your Account Manager for more details.]

apiGatewayURL: [your_gateway_url:8080]
Privileged and User Access
The Secure Remote Access Bastion should be set with a privileged AccessID with Read and List permissions to fetch the relevant secret on behalf of your users, set the privilegedAccess field with the relevant AccessID (check the Authentication section below).
Users can have only List permissions on their secrets. Upon successful authentication against your IDP, the bastion will fetch the requested secret from Akeyless and inject them directly for your users transparently. To control which users will be allowed to request access from the Akeyless SRA Bastion, set the allowedAccessIDs field with a list of AccessIDs that will be authorized to request access.
privilegedAccess:
	accessID: "[access_id_with_read_and_list_permissions]"
  accessKey: "[relevant only for API Key auth method]"
  allowedAccessIDs:
    - [access_id_with_list_permissions_only]
    - [another_access_id_with_list_permissions_only]
Keyless SSH Capabilities
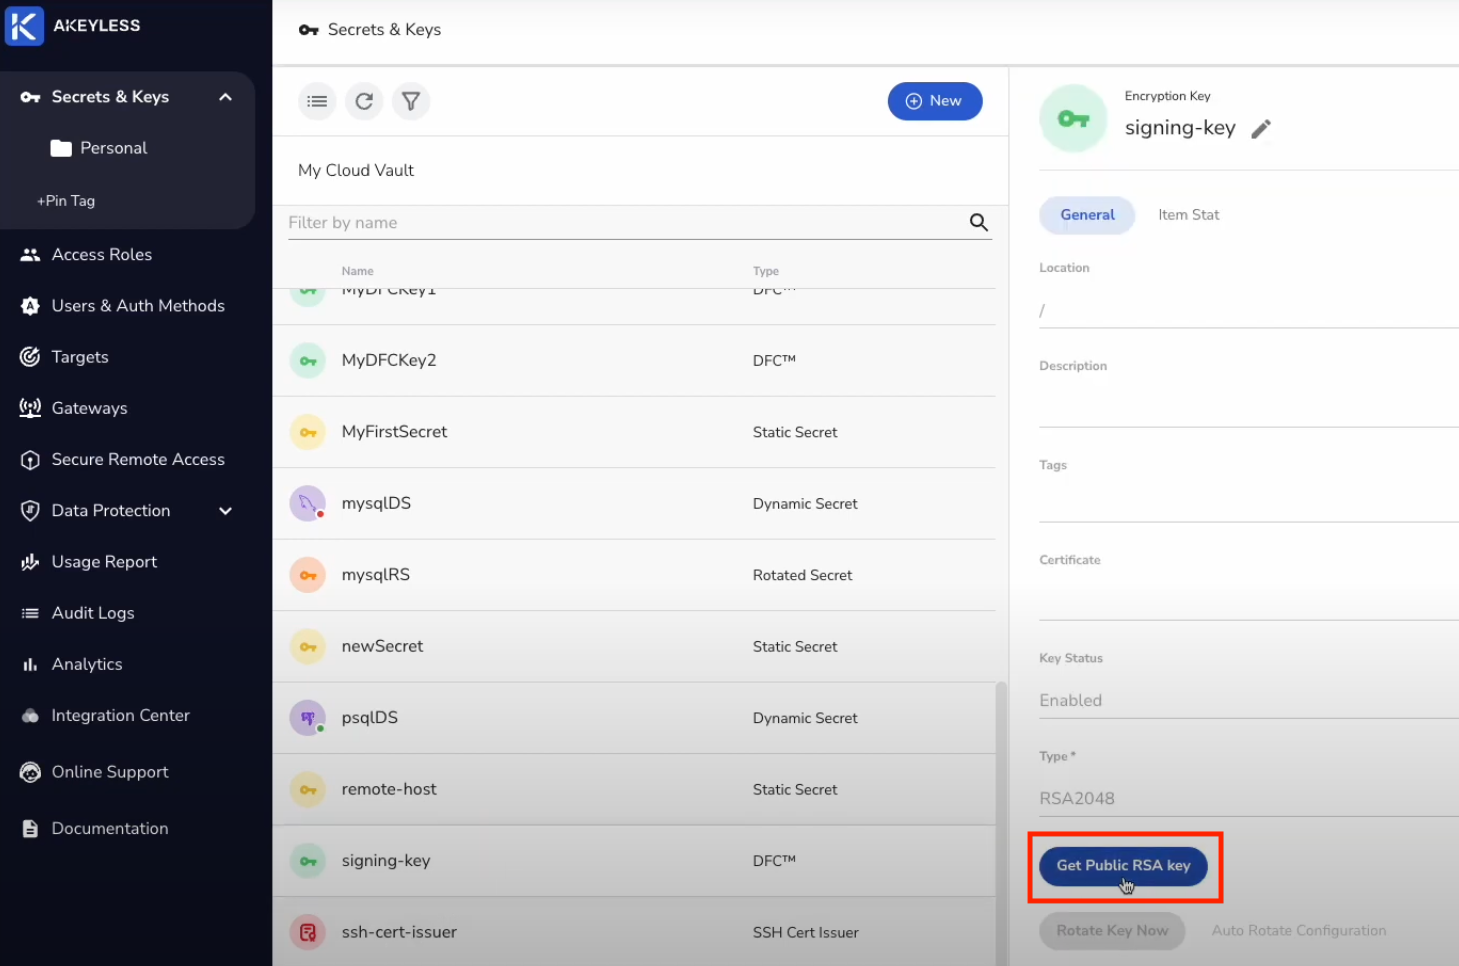
To provide just-in-time native CLI access for your users using Keyless SSH, set the CAPublicKey field (further below in the file) with the matching public key of the key you used to create the SSH Certificate Issuer.
Tutorial on Keyless SSH and SSH Certificate Issuer is here.
config:
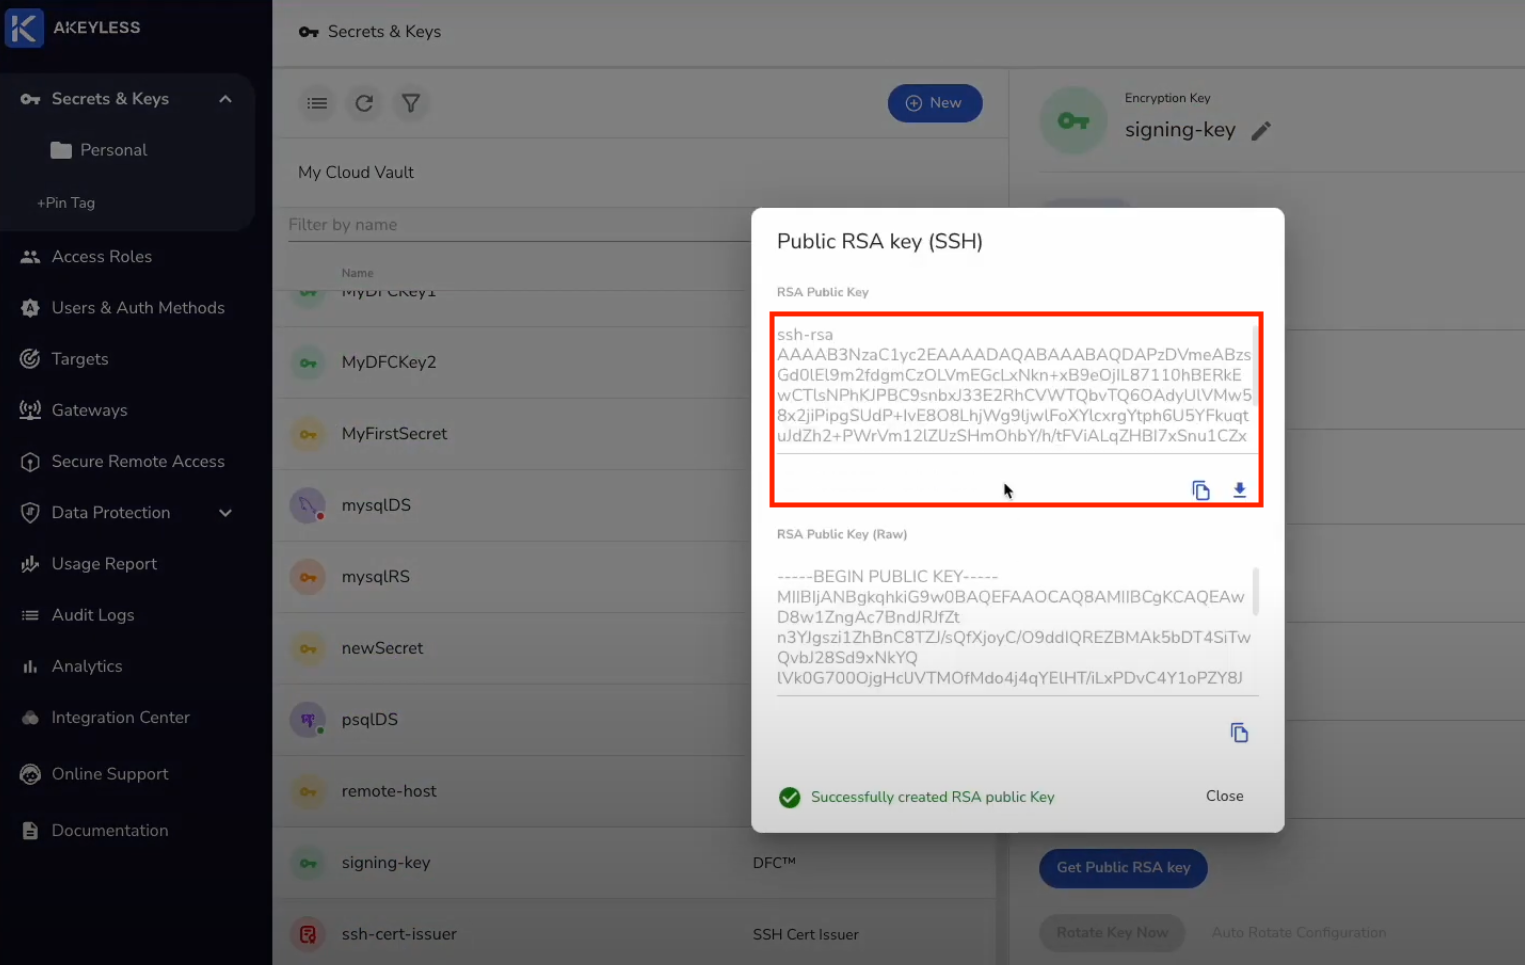
CAPublicKey: "ssh-rsa AAAAB3NzaC1yc2EAAAADAQABAAABAQDAPzDVmeABzsGd0lEl9m2fdgmCzOLVmEGc...."Example of where to find CA Public Key in Akeyless Console:
Authentication
The following Authentication Methods are supported for the privilegedAccess section of the above configuration file:
- API Key
- AWS IAM
- GCP GCE
- Azure Active Directory
You can learn how each is used in the docs.
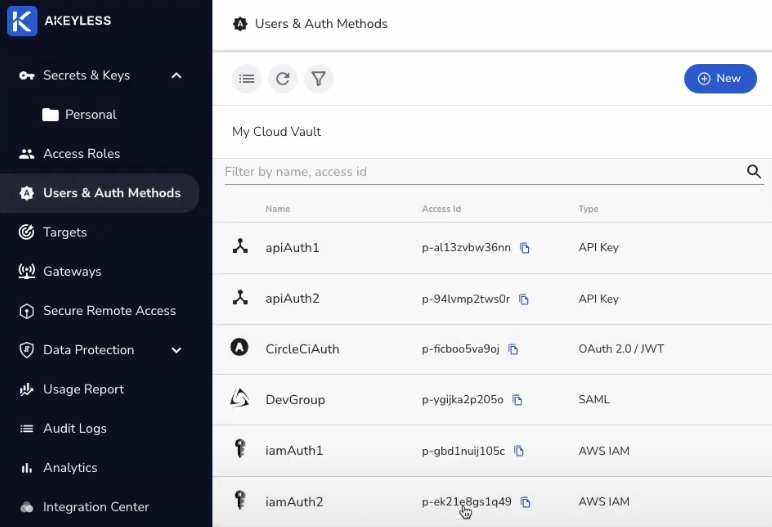
In this demo, we used one of our AWS IAM AccessID:
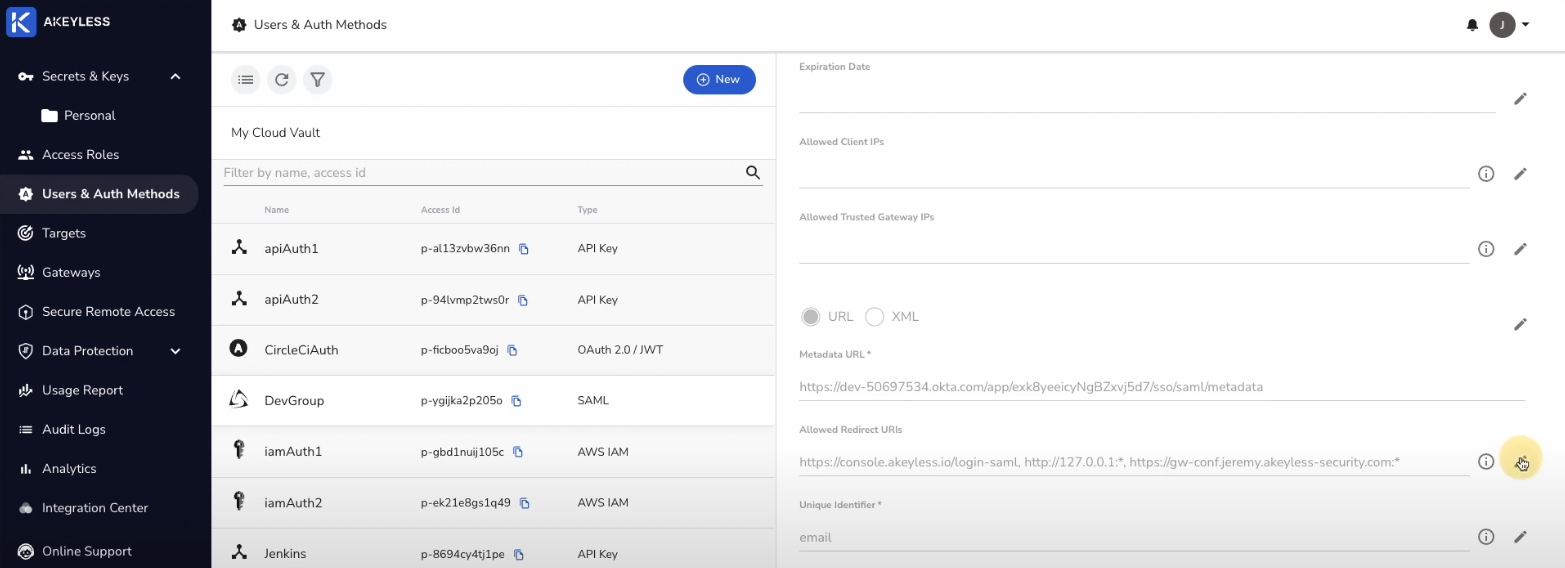
Redirect URI for Zero Trust Portal
In order for our List only Authentication Method to be validated as part of the authentication flow for the Secure Remote Access Portal, we need to add a Redirect URI for that Auth Method as follows:
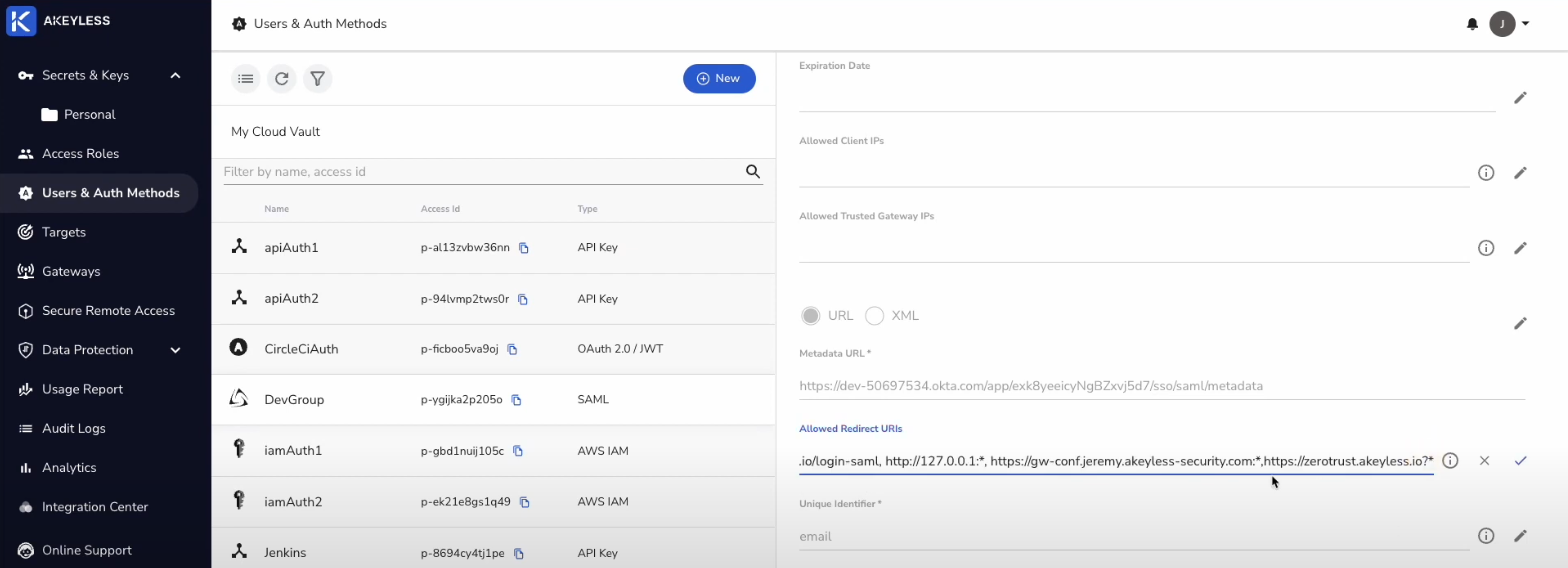
Go to Users & Auth Methods and click on the Access ID. Then click on the pencil icon next to Allowed Redirect URIs.
Then, add a comma after the last entry and https://zerotrust.akeyless.io?* and click the check mark to save it.
Install the Helm Chart to Deploy the Bastion
Run the following command to deploy the SSH Bastion and Web Bastion.
helm install <RELEASE NAME> akeyless/akeyless-sra -f values.yamlYour "RELEASE NAME" can be whatever you choose.
Run the following command to check the status of the containers.
kubectl get podsYou should see these two among your containers:

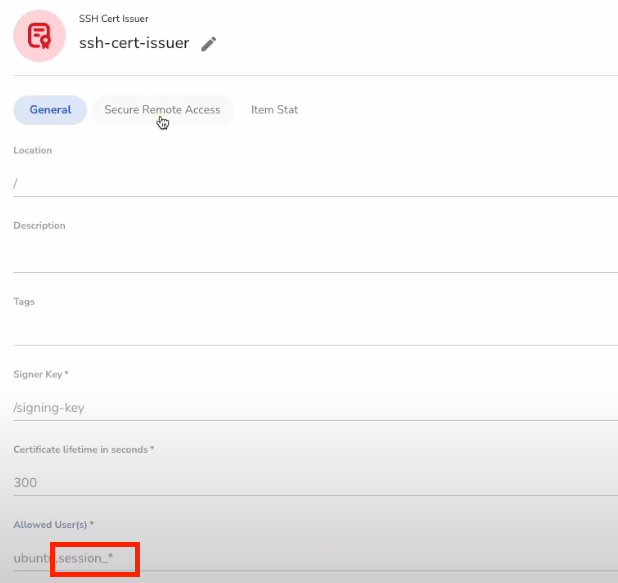
Enabling the Secure Remote Access Portal
In order to enable a connection with the SRA Portal, we first need to go back to our SSH Certificate Issuer in the console and add a comma and then "session*_" to the "Allowed User(s)" section.
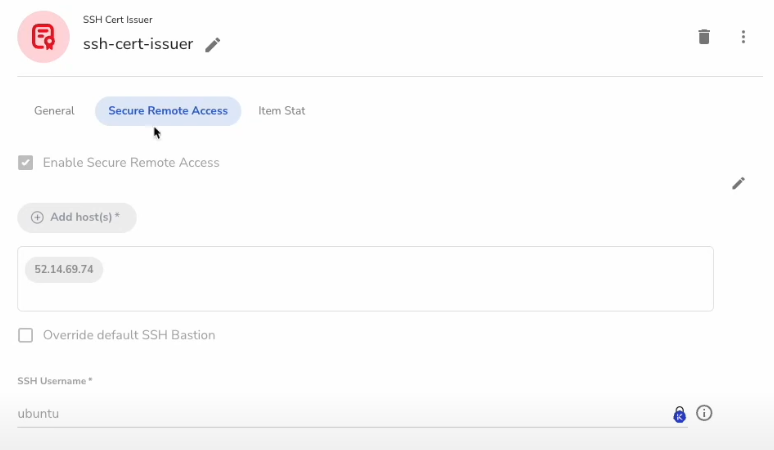
Next, click on the "Secure Remote Access" tab and enable that feature for the SSH Certificate Issuer.
Click on the pencil icon next to "Enable Secure Remote Access", click that tick box, then click on the "Add Host(s)" button and add any remote machine host in there. This is a requirement for the SRA Portal and will also show us an SSH tile in the portal when we are logged in.
Accessing the SRA Portal
Now that everything is in place, let's give our users access to the portal.
The first thing we need to do is go to https://zerotrust.akeyless.io/login. Once there, put in the SAML Access ID we created with only List permissions. Add the Gateway URL with port 8080. Finally, add the Web Bastion URL.
Finding the Web Bastion URL
The Web Bastion URL can be found in the Kubernetes Services section of our cluster. Go back to the command line and run the below command to get the URL.
kubectl get servicesThe output will look something like this:

Use the "External-IP" of the "web-sra-bastion-akeyless-sra" and add that to the "Web Bastion URL" field.
Do not click the "Sign in" button at this stage. As the admin, you are giving access to users.
Next, click on the "Generate SAML Bookmark URL" button which will copy the full link of the SRA portal including the Access ID, Gateway URL, and Web Bastion URL. You can save that as an actual bookmark or send the link to your users to give them access to the portal.
Logging into the SRA Portal
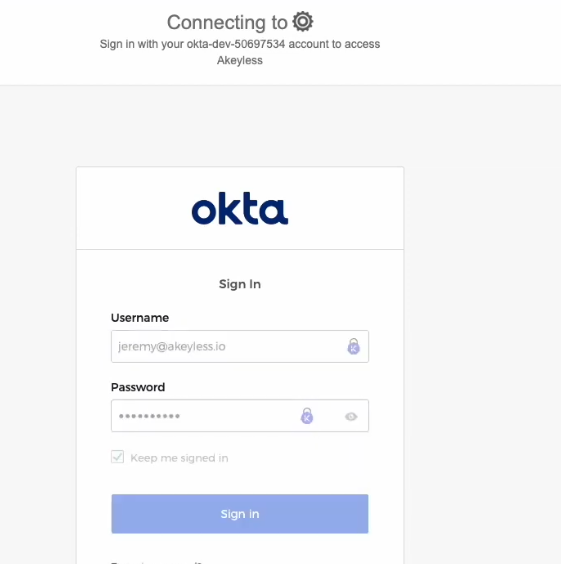
Once you send the link to a user, they can simply paste that into the browser address bar. That user will then be redirected to the IDP based on the Authentication Method you chose (Okta for this demo) and once the user is logged in, they will be sent back to the portal showing what they can access.
If the SSH Remote Host is the only application that was enabled for Secure Remote Access, this is what the user will see.
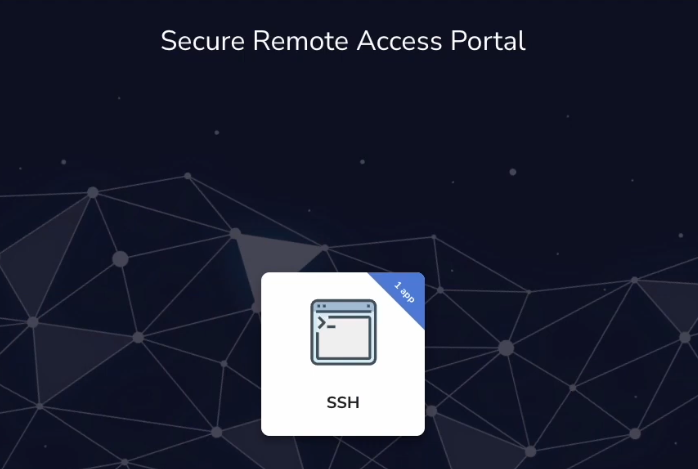
In the next demo, we will add a PostgreSQL tile and show how a user can login to the application in a CLI-based or web-based session.
Updated over 1 year ago