
AWS IAM Authentication and Access
Deeper DiveFor more in-depth information, check out our detailed documentation on the following topics:
AWS IAM AuthenticationRole-Based Access Control
Need any help?If something in this tutorial isn't working as expected, feel free to contact our support team via Slack.
Below is a text-only guide for users based on the above video
How does AWS IAM authentication work?
The AWS IAM authentication method is a way to authenticate AWS infrastructure to Akeyless based solely on AWS roles assigned to the infrastructure rather than tokens. Without a token, the security risks for the system are minimized and it also makes setup really easy. The idea here is that IAM authentication uses AWS as a trusted identity provider. Akeyless works behind the scenes to connect with AWS, and, if the roles and other details attached to the infrastructure match the configuration in Akeyless, access is granted to the AWS resource you are interacting with. And you easily can change access by modifying either the IAM role or Akeyless access role.
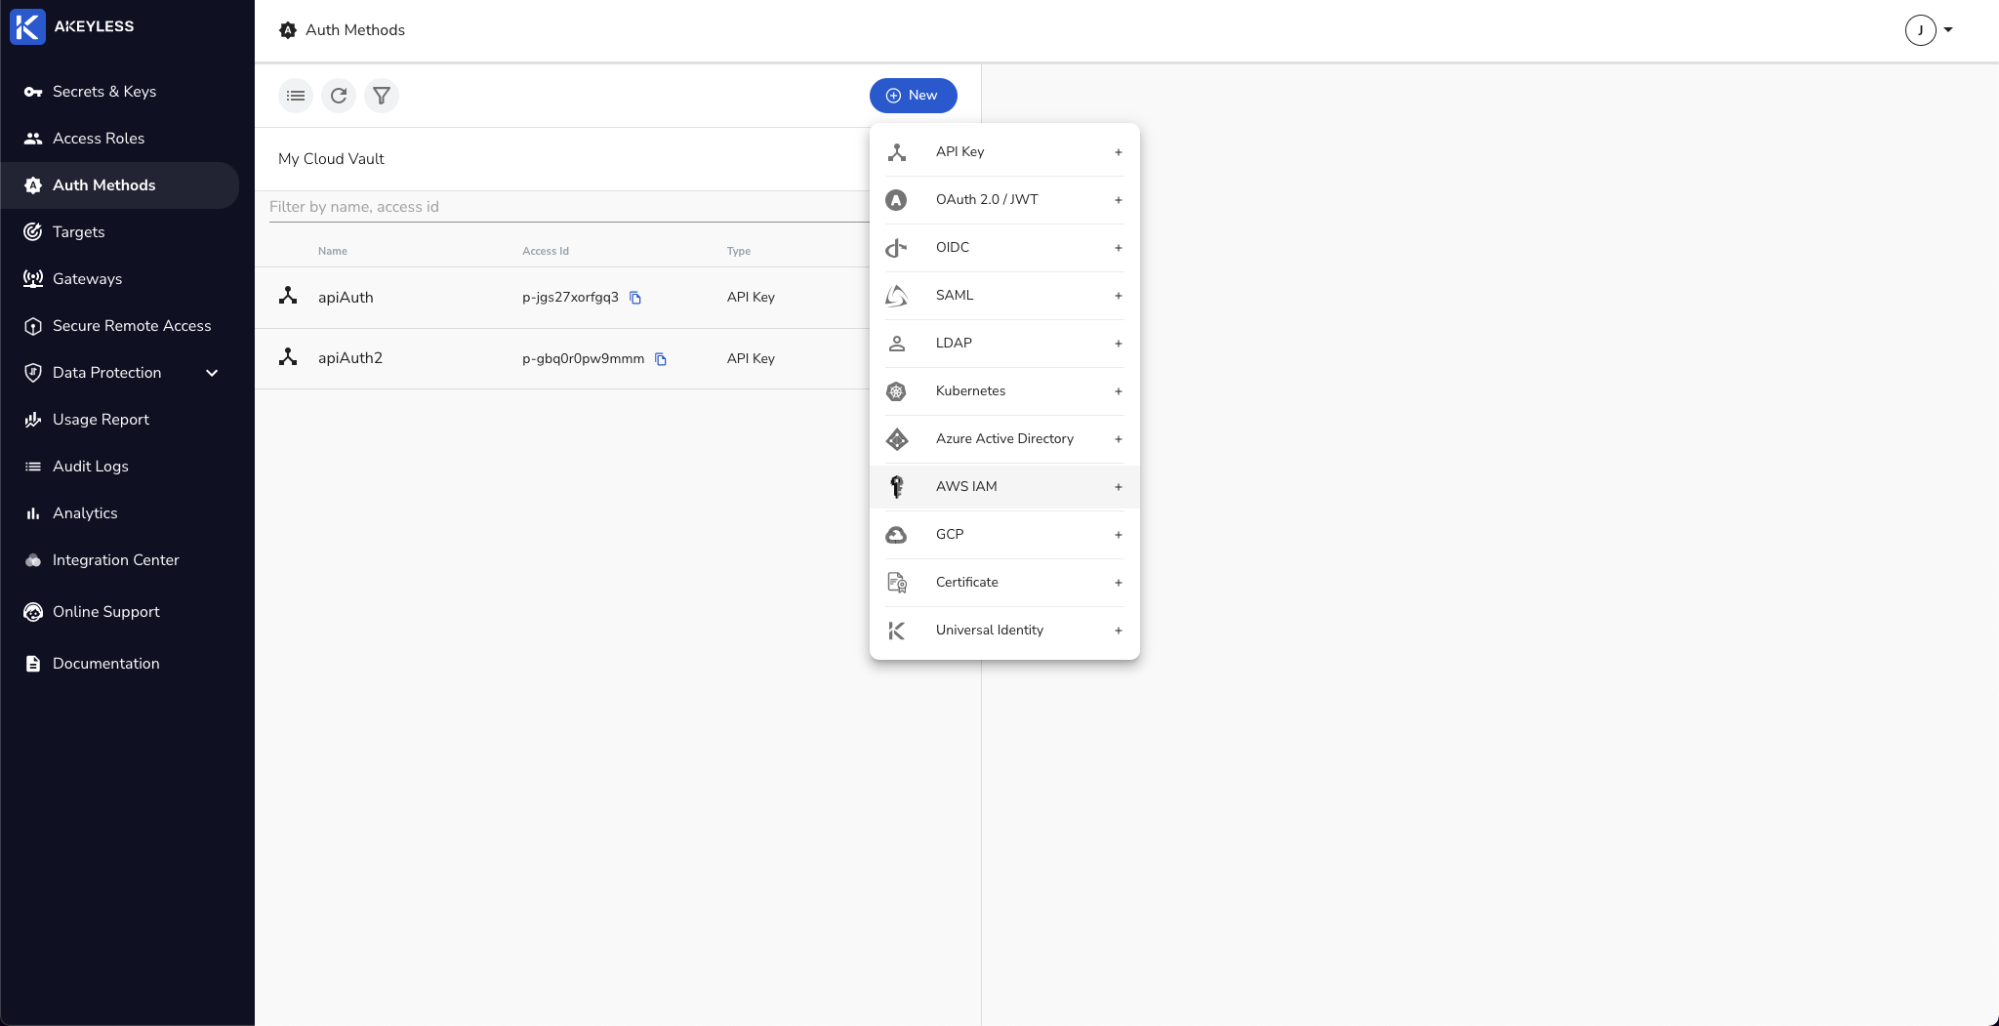
Create an AWS IAM Authentication Method via the UI
Go to Auth Methods.
Click 'New' and choose AWS IAM.
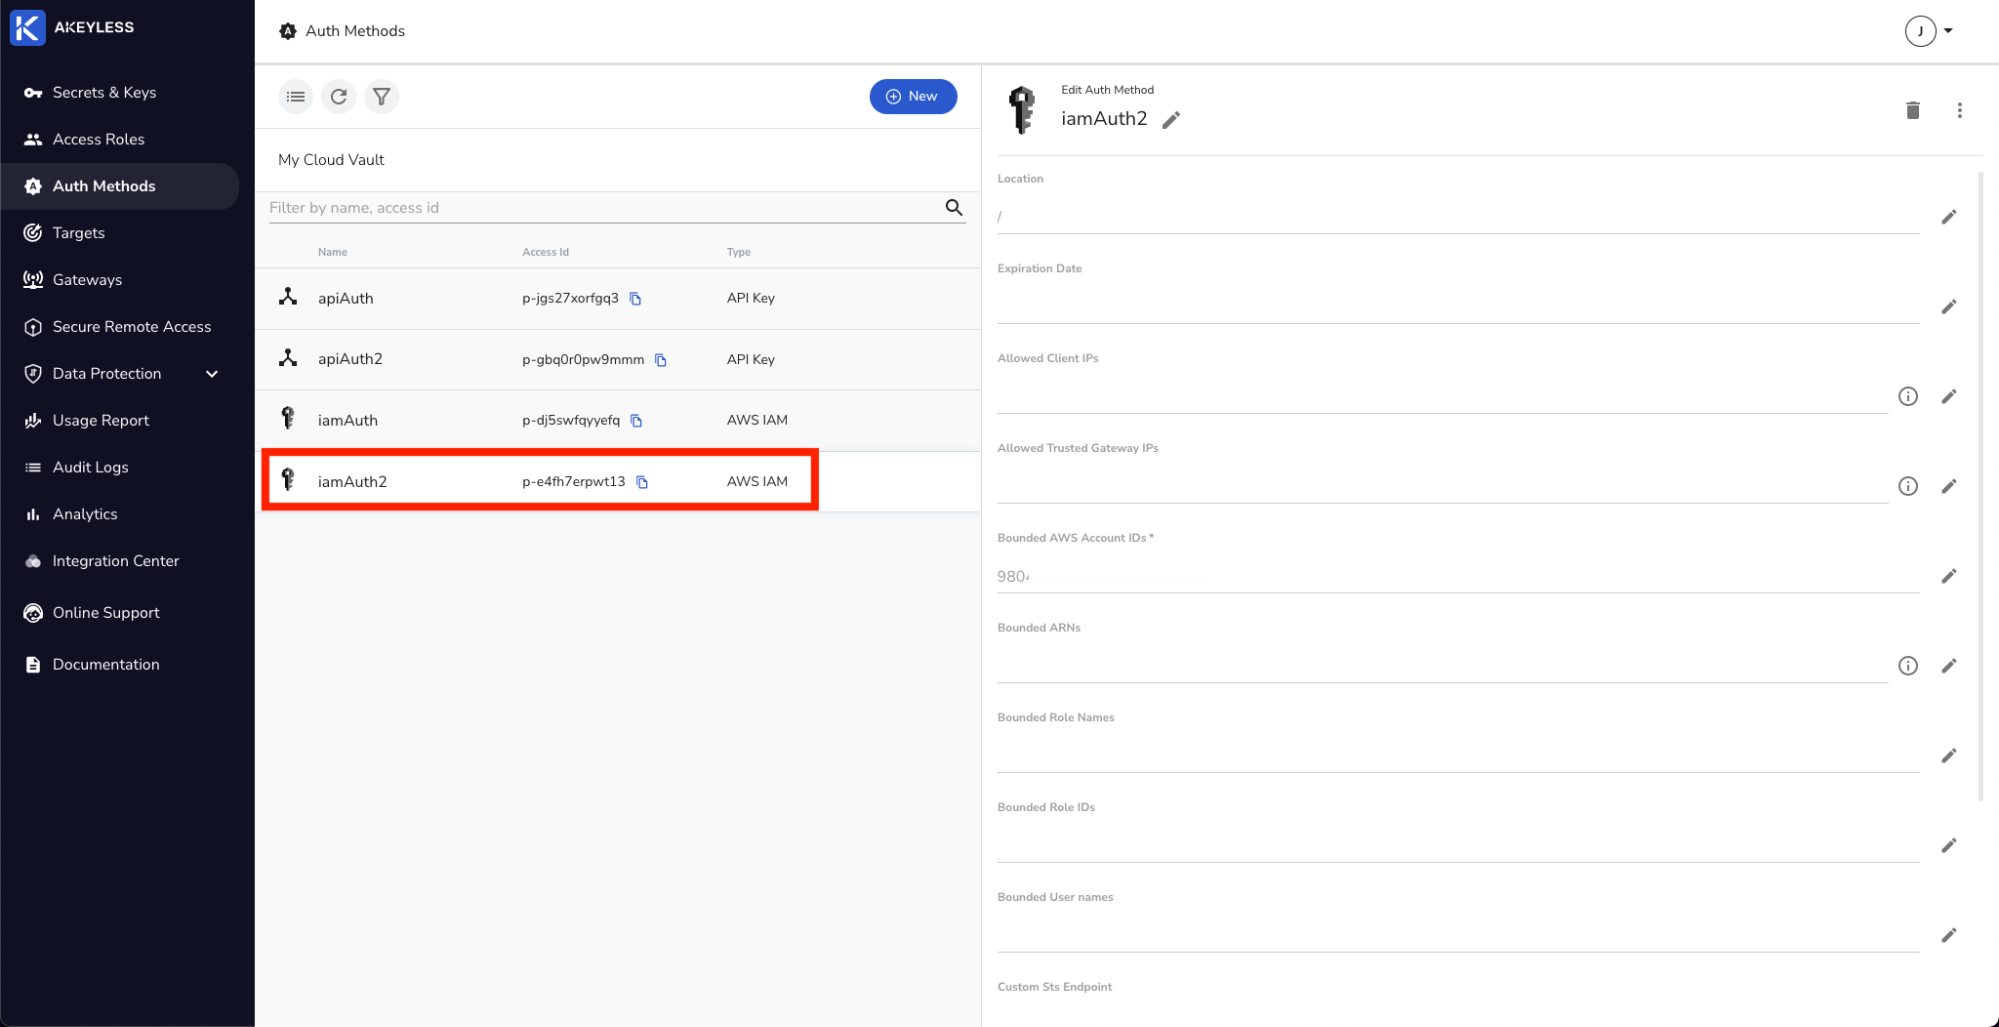
Add a Name (iamAuth1 in this case) and Bounded AWS Account ID. We will also give it a Bounded Role Name.
Best practice is to add at least one other parameter to ensure least privilege access.

Create an AWS IAM Authentication Method via the CLI
Run the following command in your local terminal:
akeyless create-auth-method-aws-iam –name [auth_name] –bound-aws-account-id [aws_account_id]This command will create the iamAuth2 Authentication Method. Go back to your console to see it in the list.
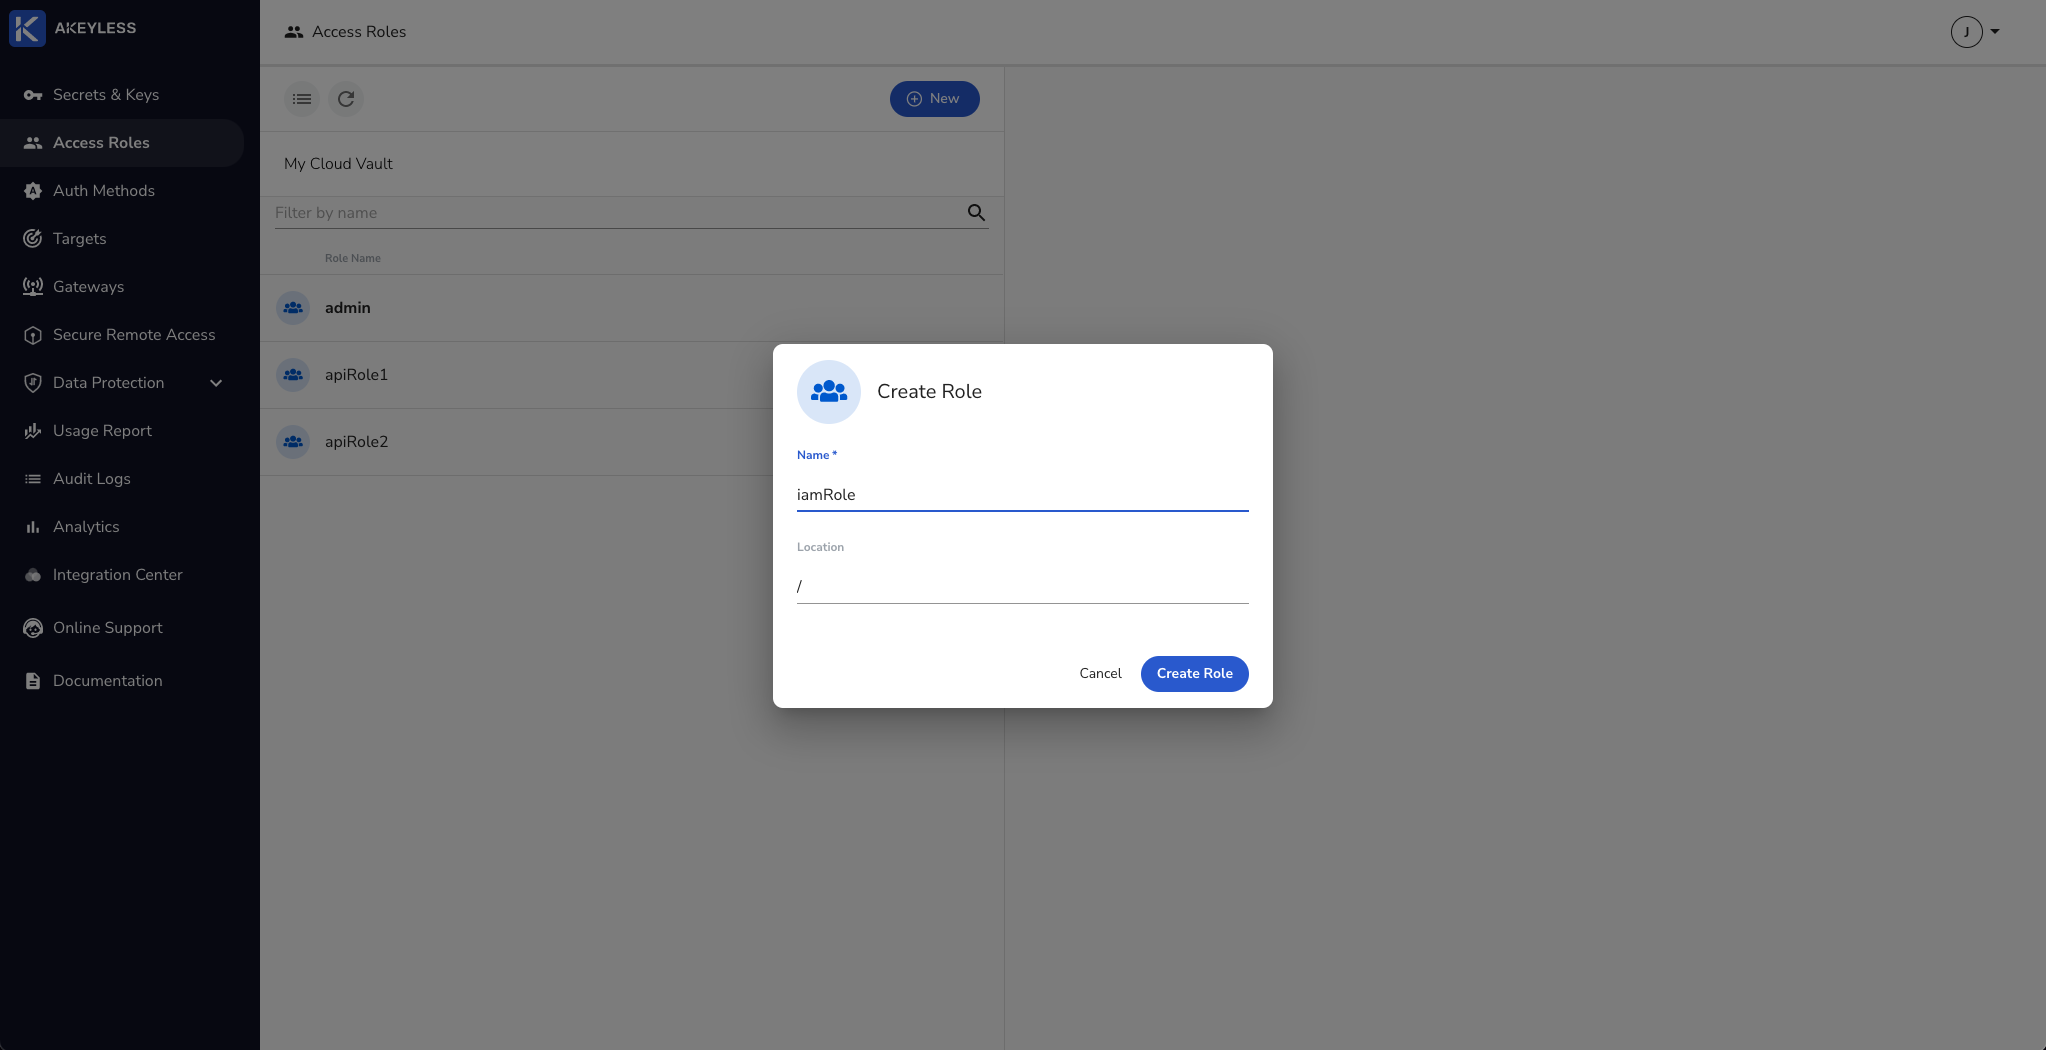
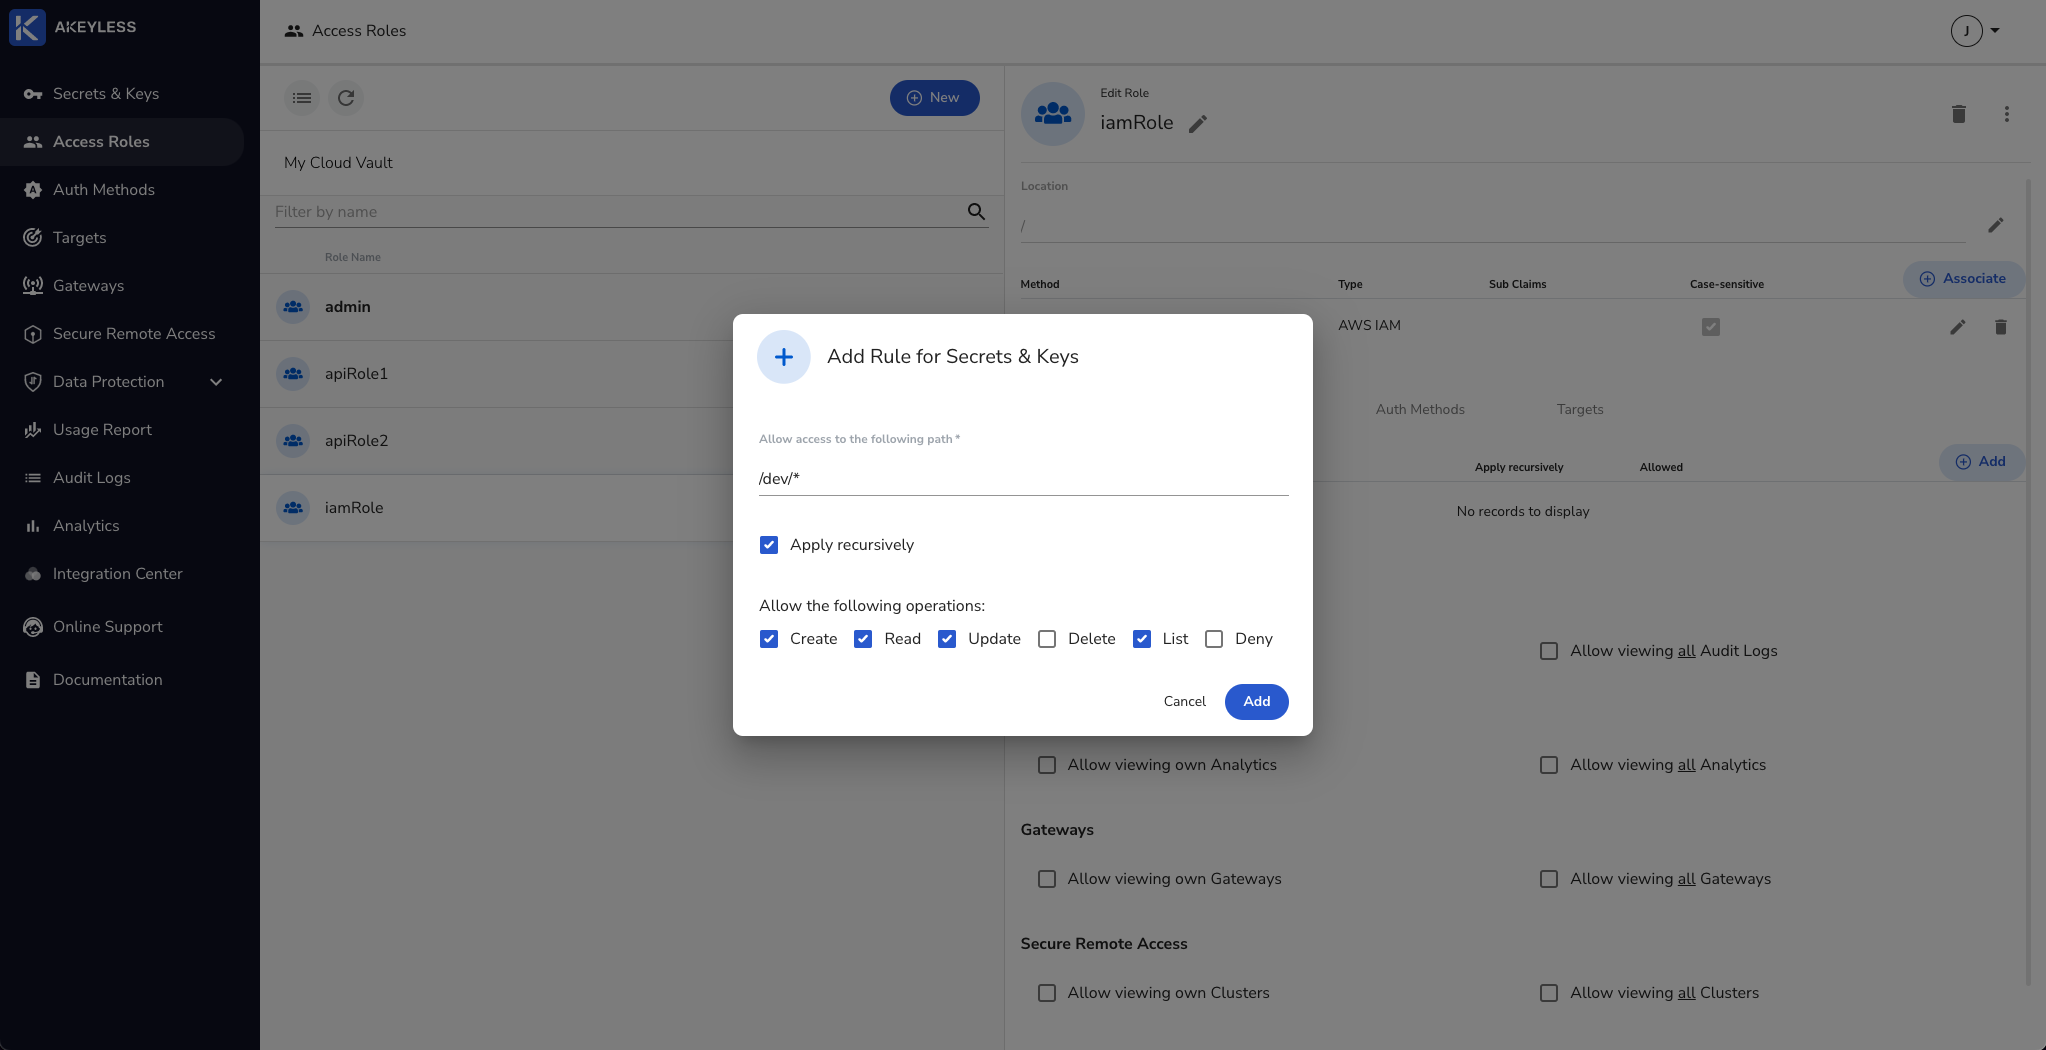
Create an Access Role with permissions
Go to Access Roles.
Click 'New' and add the name for the Role.
Click the 'Associate' button and choose the iamAuth1 Authentication Method and then 'Save'.
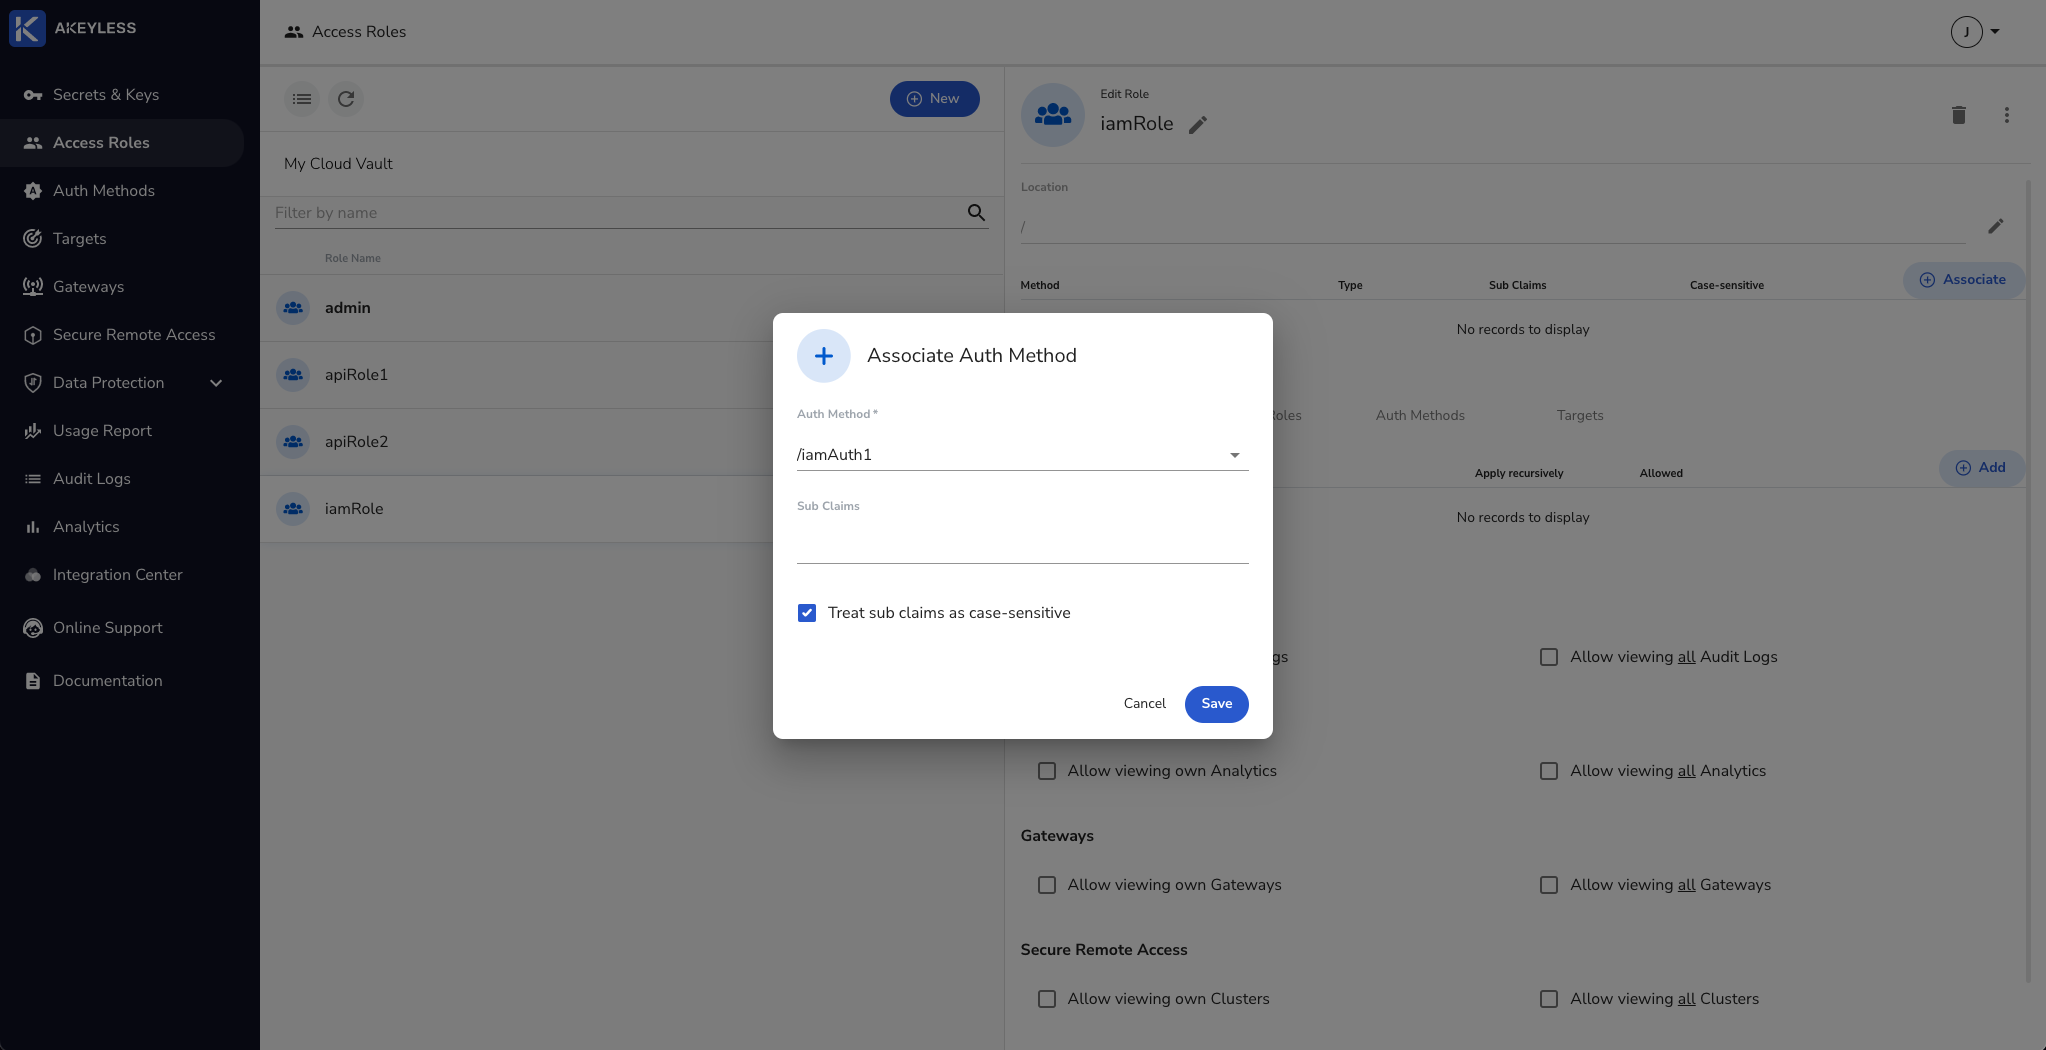
Next, add permissions for Secrets & Keys and click the 'Add' button. Then choose the folder to share and permissions to give and click 'Add'.
You can create a role via the CLI using the following command:
akeyless create-role --name [role_name]You can Associate an Authentication Method with permissions using the following command (see the docs for more options):
akeyless set-role-rule --role-name [role_name] --path "/path/to/folder/*" --capability read --capability create --capability update --capability listConfigure the CLI to work with AWS IAM Authentication
First, go to your AWS resource (an EC2 machine in this case) and install Akeyless CLI.
Run the following command to enable the CLI to work with the Authentication Method:
akeyless configure --profile default --access-id [auth_method_access_id] --access-type aws_iamYou will receive a response that says "Profile default successfully configured".
You can now fetch the secrets you have permissions to and take other actions based on your permissions profile. We only have access to the 'dev' folder in this demo.
akeyless get-secret-value --name [path_to_folder/secret_name]Modify IAM Role in AWS to change access
In our example above, we used the Bounded Role Name field in Akeyless to bind the Auth Method to that IAM Role only. If you want to see the IAM Role binding affects the ability to authenticate, you can try this.
Go to your AWS instance and click 'Actions' -> 'Security' -> 'Modify IAM role'.
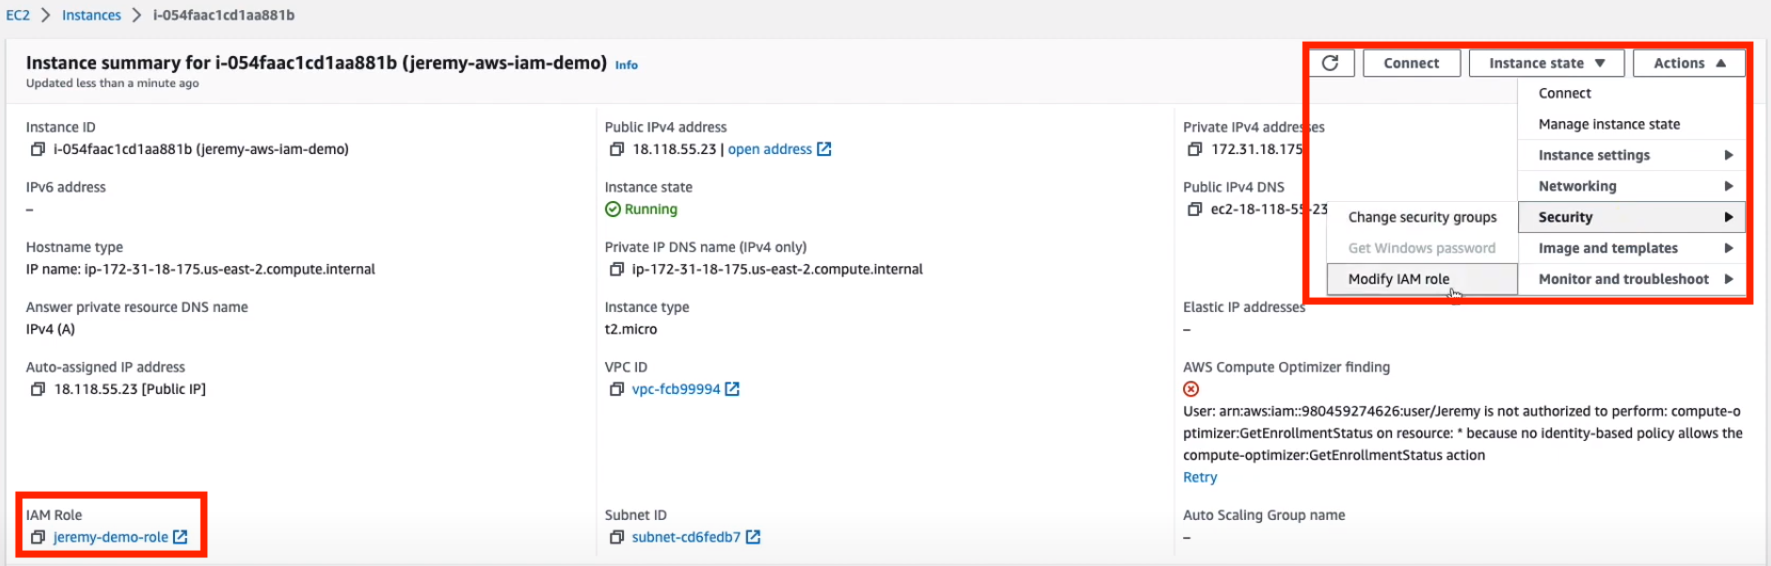
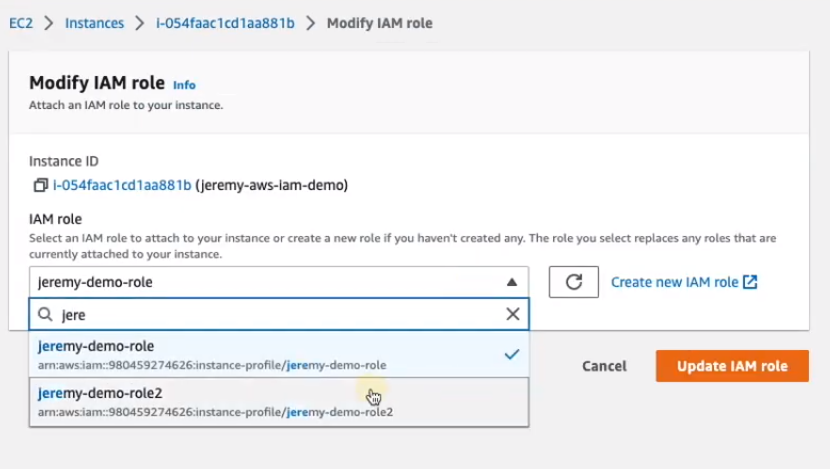
Change the role to one that doesn't match the Bounded Role Name you chose in Akeyless and click 'Update IAM role'.
Once you do that, go back to your terminal and run the following commands (clear the cache first, then run the command as before):
rm .akeyless/.tmp_creds/[default-access_id] ## This will clear cache
akeyless get-secret-value --name [path_to_folder/secret_name]
The response that comes back will be:
can't setup akeyless client: failed to get credentials.
error: Desc: Failed to authenticate token based access.
Status 401 Unauthorized, Error: AuthenticationFailed.
Message: access authentication failed
Update the AWS IAM role to the original one and run the command again and you will be able to authenticate and get the secret value.
Updated 3 months ago